Tuesday, July 24, 2012

TUTORIAL: Sand and Plaster Beach Molds

I've been wanting to do this for years. But as every summer rolled around and we visited the beach with our family, I'd forget to bring the supplies. Doh.
So this year I was determined to make it happen.
We did!
And it even morphed from simply molding my kids hands to other beach-y objects....like this:
to this!
And we drove home to Texas with real beach momentos to decorate our house. I love how the glasses almost looked brushed in gold.It was all thanks to the special ingredient, Plaster of Paris:
and the sand of course.
I sort of remember using Plaster of Paris back in the day (probably for a Girl Scout project) but I couldn't remember quite how it worked.
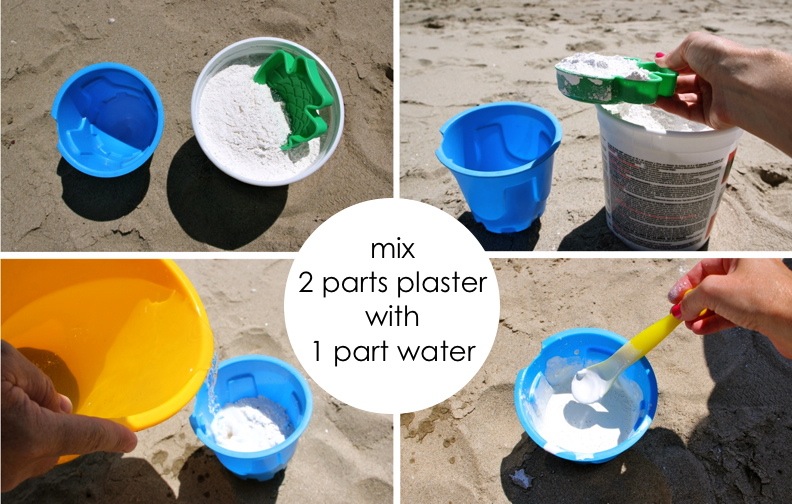
Mix plaster and water?
Oh yea. Now I remember.
EASY.

You just need a mold to pour the wet plaster into. And damp beach sand makes the perfect spot, though you can also use your sandbox or even clay to create your mold.
Now aside from the process being easy...I will say that it's also pretty messy (but hey you're at the beach). And we also lost a few finished products because some fingers broke off or the tide washed them away.
Exhibit A, Lucy's sad broken hand:
So watch where you create your molds if the tide is coming in. And transport the finished items carefully.

Okay, here are the simple steps:
• You can buy Plaster of Paris at Michaels and other craft stores for about $7
• You don't need a proper measuring cup, just use whatever you have on hand...toys, drinking cups, etc.
• Saltwater from the ocean works just fine.
• Work in small batches till you find the proper consistency.
• You don't want the plaster to be too thin and milky or it will seep into the sand. However if it's too thick, it will dry faster than you can pour it. Mix it till it's like a milkshake.

Next....
• You definitely need wet sand to create a mold but you don't want it so hard that a child won't be able to create a hand imprint. The best sand is right above where the tide breaks.
• Loosen up the sand a bit with you hands and smooth it out. Then help your child press their hand or foot or face?? into the sand and carefully pull it back up so the mold is as precise as possible.
• Work quickly to pour the plaster into the mold. Try not to leak any plaster outside of the mold.

When the mold has dried for only 5 or 10 minutes, use a feather or stick (whatever is around) to inscribe your child's name and the date on the back. You could make this an annual tradition, capturing your child's growing hand from year to year. The plaster molds make cool artwork for you home or beach house. Or give one to a Grandparent for Christmas. Make paper weights. Shadow box art? There are many possibilities.
While the plaster dries, enjoy the other beach amenities.
Then after about 30-40 mins, the plaster molds should be finished!

• Wash the molds off in the ocean and admire your amazing art.
• Place them in a safe place near your other belongings. You may want to bring a cookie sheet or pie pan with a towel inside to transport the finished molds. This will prevent them from getting stepped on and they can continue drying.
• When you're home, you can remove excess sand with an old toothbrush or cleaning brush. Just work carefully to avoiding breaking any plaster and don't brush off all the sand. That's the charm!

And there you go.
From glasses to beach art.
(btw, glasses are from Forever 21. $1.80 regular price. What tha what?)

Then find a cool place for your souvenirs, on or off the shelf.

Thursday, July 12, 2012

see you TONIGHT

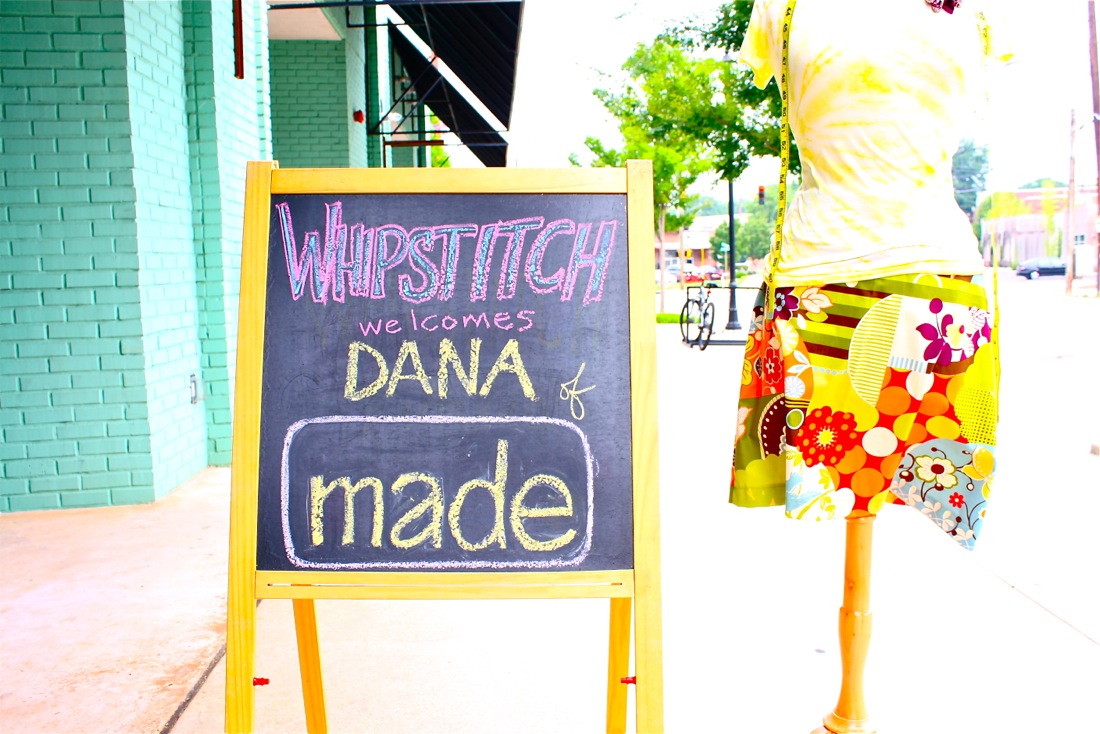
We made it to Atlanta and I'm looking forward to the book signing tonight at Whipstitch Fabrics!
Come hang out with us!
Even if you don't have a book, you always need fabric....right?


Fabrics A to Z Book Signing
Thurs 6/12, 6:30-9:30pm
Whipstitch Fabrics
1000 Marietta St, #102
404-897-1114
See you soon!

Tuesday, July 10, 2012

TUTORIAL: Ruffle Blanket

I thought I'd pull something out of the drawer for you today.
One of my all-time favorite blankets to make (and giveaway as gifts).
It's perfect for snuggling in a crib or swaddling a baby.
And really, it's just cute--you know I love stripes.
(and in case you're doing a double-take on the babe above....it's not Clara. I made this blanket when my niece Anna was born. And she still uses it today! It's her favorite blankie, which makes me happy)

In fact, I first started making these 6 years ago for Lucy. I wanted a receiving blanket with a ruffled girly border but I didn't want it to be heavy....just a single layer of fabric. So I broke out my serger, made a flannel border, ruffled it up, and sewed it to a square a fabric. Pretty easy!
Don't worry if you don't have a serger. I'll show you an alternate method. But it really looks best if you have a serger. So if you've been scared to try yours out (aka...it's still sitting in the box) now's your chance to learn!
Okay, let's get started....

You need:
appx 1 1/4 yards of blanket fabric (knit or flannel) - to make a 42 x 42 inch square
* appx 1/2 yard of border fabric (flannel is best but knits works too)

* You want the border to be about 1.5 to 2 times longer than the blanket perimeter, so you can ruffle it up. So....the amount of fabric needed really just depends on how wide and how ruffled you want the border to be.

Here's what I've figured out:
42 x 4 = 168 (perimeter around the blanket)
168 x 1.5 = 252 (how much border you need)

If you cut 1/2 yard of flannel fabric into (6) 3-inch wide strips of fabric for your border, that gets you pretty darn close.
If you want the border to be super ruffly, then cut a couple more strips to give you more border length.

Okay.
Hope that wasn't too confusing.

Basically you need a big rectangle of blanket fabric and a bunch of strips for the border:
First, finish off the edge of the blanket piece. If you have a serger, serge around all four edges using a standard overlock stitch (3 thread or 4 thread). Dab the ends with a tiny bit of Fray Check or pull the chain ends back through the stitches (I never do that. I'm lazy).

If you don't have a serger.....you can leave the edges raw if you're using a knit fabric. However, if you're using flannel, you'll need to fold/iron the edge under 1/4 inch, then fold/iron the edge under another 1/4 inch and sew a topstitch. If you don't do this, the flannel will fray badly and you don't want that with a baby.
Second, prepare the ruffled border.
(pics numbered below....)

1. Cut even strips with a rotary cutter.
2, 3, 4. With right sides of the fabric together, sew all the strips together into one very long strip of fabric. Be careful with each strip you sew that right sides are together (believe me, I've made this mistake...and it's annoying). If you have a serger, do this with your serger so there are no raw edges. If you don't have a serger, just leave the small seams raw or you can finish them off with a zigzag stitch.
5, 6. You should have one long strip of fabric now. Yay!
7, 8, 9. Use your serger to finish off both side edges of the long strip. Serge down one side, then serge down the other (this will take a while and will be noisy for your husband trying to watch sports center). If you don't have a serger....well....then I recommend using knit fabric rather than flannel for your ruffle, so you can leave the edges raw. I've tried to think of a good way to do with by folding/ironing the border edges under with flannel but it sounds super tedious and I think it will make the border too bulky. So. Sorry. Go with knit, not flannel.
Now it's time to ruffle the border.
You REALLY want to use the "cheating" method here to gather your fabric. There's no reason to do proper gathering on 200 inches of fabric....or you'll go insane, and never speak to me again.

If you don't know what the cheating method is, check it out HERE.
Basically....turn your tension as high as it will go, turn you stitch length to the longest possible, and start sewing down the edge of the border strip, about 1/4 inch from the edge. If it's not ruffling up enough, hold the thread on your machine slightly to create more tension.
And you have a ruffled border!
Lay it out around your blanket piece to make sure it's long enough. If it needs to be longer, shift your ruffles around a bit to make it fit.
Now sew the border to the blanket.
(pics numbered below...)

1. Pin the border to the blanket so it hangs about 1/2 inch on top of the blanket.
2. Gather the fabric a bit around the corners so it has extra room to spread (and doesn't pull)
3. Pin the border all the way back the entire blanket.
4, 5. Sew the border closed by placing right sides of the fabric together and sewing (do this while the border is still pinned to the blanket. This is the best way to make the it fit perfectly).
6. Pin the sewed end of the border to the blanket.
7. Sew the whole border in place. Sew about 1/4 from the ruffled border edge. No right or wrong answers here. Messy lines actually look kind of cool with the serged edges, so don't worry about being too precise. Just make sure the whole border is sewn in place.
8. Always do a quality check on the back to make sure you sewed everything.
9. Add a label if you have one.
And....you're done!
How snuggly fun does that look?
If you're headed to a baby shower, tie fabric scraps around the blanket to make a bow and you've got the perfect gift. Seriously, I love these blankets.
I hope your little one does too.

Monday, July 9, 2012

I need your Southern Hospitality tips and recommends

Hello again friends!
I'm on a trip, within a trip, sans kids. 
And if you've been following along in Instagram or Twitter (@danawillard) you've already tipped me off to great restaurants and must-see spots.  Thank you!

But I know there are many of you living in the southern belt and I'd love your expert advice. 
If you have any restaurants, destinations, touristy must-sees, or local hang-outs you recommend, please let me know in the comments!

Here's our itinerary:

• Charlotte, NC (finished that leg)
• Charleston, SC (currently there)
• Savannah, GA (headed there today)
• Asheville, NC (meeting with my publisher)
• Atlanta, GA....book signing baby!  Hopefully you'll be there.
I'm loving this East coast flavor so far.   Very different from life on the West Coast and big ole Texas.  But I'm taking more showers, eating tons of treats, and taking way too many pictures.
More to come....

Thanks for your help!

Book Signing Party!...coming hopefully to a city near you

It's been a few months since Fabrics A to Z hit bookshelves, so how about a book signing party?!
I'll be in Atlanta, GA THIS coming Thursday night, 7/12 to chit chat, hang out, and sign your books.

And it's all happening at Whipstitch Fabrics.
You know I love that place.   And you know I love Deborah who owns the shop.  And you know she's hilarious and has a wonderful selection of fabrics.  So the night won't disappoint!  Did I mention door prizes?  Well then.
Here's all the info.....

(poster created by Q.A. Design.  Thanks Jenna!)
See you guys on Thursday!
* bring your books or purchase one that night

Tuesday, July 3, 2012

Hello friends!
It's been a while.  I'm here!  Just hanging out with family and friends...enjoying a little vacation time. 

I was going through old photos on the computer and came across these from Christmas 2010.  Sheesh, that's like a decade ago.  The pics must have gotten buried in the 27,000 files of my iPhoto.  So how bout a little Christmas story?....
I'd been asking Lucy for months what she wanted for Christmas and she couldn't think of anything.  (really?  What normal kid can't ramble 20 items off their tongue?)  But then 4 days before Christmas she blurted out, "I really, really want a snow white dress!".
Huh. 

---info that would have been helpful on November 1st when all the Halloween costumes were on uber cheap clearance----

 So....she told Santa about the dress, she reminded me about it multiple times, and she was certain a snow white dress would show up on 12/25.

I checked every Target and Disney store near us for any kind of Snow White dress.  I didn't even care if it was one of those gawdy over-priced ones.  Nothin.  Apparently stores only sell Snow White dresses at Halloween since she's not a very "popular" princess.....cause no girls can mimic her lovely vibrato?
 
Finally on Christmas Even we made a last ditch effort and drove to a far away Toys 'R Us.
And drumroll....they had one!   But.
It was kinky Snow White, with the shortest skirt I'd ever seen (on a Princess that is).

It was such an odd combo.  A four year-old sized top with a tiny poofy bottom.  So I grabbed the dress and just hoped I had supplies to fix it at home.  I did!

With a yard of cheap poly satin, I created a new, long skirt to go under the short one.   
But I was worried about the bulk of the new skirt feeling scratchy at the waist, so first I made a simple lining for the dress from an old thrifted Tee.  To do this, I laid the dress on a few pieces of paper and roughly traced out the shape of the bodice, tank top style with an open back.  Then I attached a long gathered at the end of the lining, so the gathered bunches would be hidden between the poofy outside skirt and the new long skirt.  Then I sewed the lining to the dress at the back closure, the neck, and armholes. 
Totally worked!
We had one very happy girl on Christmas morning.
It's definitely not perfect (hemline) but it's held up for two years so far.
And there you go.  Quick fix.

Have a great day!  Enjoy the 4th!  If you need last minute decor, maybe some patriotic streamers?
And if you're worried I'm going AWOL, you can always follow me on Instagram where I post photos daily. Find me: @danawillard (or follow my photos through Twitter @danawillard).
Bye!

Sunday, June 24, 2012

4 months

I missed it by a couple weeks but this little girl is 4 months old.
4 months!
And I'm so in love with her.
Not that I didn't love my other children when they were babies too. But the timing with Clara is a little different. 

Lucy was the first child and I'm sure I was anxious for her to sit up, crawl, walk, talk...you know, do stuff.  I kinda wanted her to get out of that "baby" stage.  Then when I had Owen (cough) 21 months later life was pretty crazy for a while....and Owen was a more needy baby....so I didn't enjoy that first year like I could have.  Granted, now I LOVE that my kids are 21 months apart.   I see the benefits since they are perfect playmates and honestly best friends.  I just smile watching them play.

But now with Clara....the other two kids are older (4 and 6) and I'm really just enjoying her. 
She is an absolute dream and such a sweetheart.  She drools everywhere (not so dreamy), sleeps 11 hours at night, smiles and smiles, and just chills in her carseat when we're driving. 
I can not get enough of those chubby cheeks!  I've never had a baby with so many rolls and I'm lovin it.  She's smothered in kisses all day long from me and Lucy. 
 
What I love most about her right now....
Those gummy smiles and coos,
 that her feet still fold in together, like she's clapping,
and that she can finally fit her little H&M sweater dress!
Don't grow out of it little lady.   
Here's the 4 month comparison:
We're blessed to have such a happy girl.