Monday, October 24, 2016

Mini Key Lime Pies


The holiday season is coming....which means, time to make pie!
Or many pies.
Or MINI pies.

YES.  I love pie!
And I asked Owen to help me with the recipe because he loves pie too.
Really, he just loves to bake.  Isn't it fun when you start seeing real interests in your children?  Just last Sunday, out of the blue he asked if we could make Peach Cobbler.  Um, sure!
He's also helped me make Pumpkin Pie.  And now we'll add this to his resume as well. 


Daisy Sour Cream asked me to share a holiday recipe with you. And it was a no-brainer:
MINI KEY LIME PIES

Lime + Sour cream + and mini pie tins?
Who doesn't love mini things??

And with the Daisy Squeeze bottle, this recipe is super easy for kids to help out.  Have you seen those bottles?  Brilliant.  I keep thinking of all the chili pot-lucks we've been to over the years, and how fantastic it would be to have a Daisy Squeeze Sour Cream like that!

Okay let's get squeezing....


MINI KEY LIME PIES
(makes 12 mini pies or one standard pie)

1 cup sugar
3 Tbl corn starch

1/4 cup melted butter (and somewhat cooled)
1 Tbl zested lime rind
1 cup lowfat milk
1/4 cup fresh lime juice
3 egg yolks, slightly beaten

1 cup (8 oz) of Daisy Brand Sour Cream


• Combine sugar and cornstarch in a stove-top pan.
• Mix in the rest of the ingredients EXCEPT the sour cream.
• Cook over low to medium heat, stirring constantly until thick.
• Allow the mixture to cool.

Then comes the fun part.
Squeeze in the Daisy Sour Cream.
And as any 8 year-old boy would do, inspect the contraption to see how this amazing invention works.

For the recipe you need 1 cup of sour cream, which is approximately 1/2 of these squeeze top bottles.  I just told Owen to squeeze in about half of it---you don't need to be precise.
And I love that there the squeeze top meant one less thing to clean.


Then fill those mini pie tins on up!


Top them with a bit of whipped cream and a sprinkle of lime rind.
And smile at how amazing your house smells.
Chill them till you're ready to eat.
 

These can be made one day ahead, but I wouldn't do more than that or the crust will get soft.  And if you're asked to bring them a baby shower.....double or triple the recipe. And pull out the big trays.


Okay, want to make your own pies for the holidays??  With Daisy Squeeze Sour Cream?
Tell me in the comments, what's your favorite holiday tradition?....

Wednesday, October 19, 2016

How to make a Leopard Kitty Cat Costume


When Clara told me she wanted to be a cat for Halloween I did the internal eye roll.
Really?
A cat?
Does it get more cliche or ((boring?)) or blah blah blah?
I guess every girl wants to be a cat at some point in her life?....

But then I realized how ridiculous I was being, because Clara LOVES cats. They're her absolute favorite animal and she sleeps with 3 stuffed kitties every night.


So of course she should be a cat!
And how stinking cute would a Clara Cat look?
AND....what if we made it a leopard cat?
Okay.
I was totally on board.


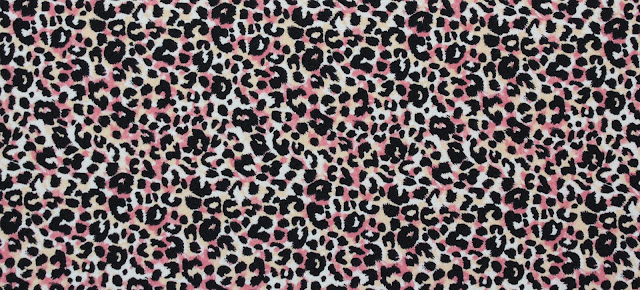
Just having an excuse to buy leopard knit spandex made me happy.
And guess what?? There are some great choices at Girl Charlie.  Can you imagine a whole "family" of little girls in different leopard prints?!
Clara and I picked our favorite---pink, peach, + black.
Ahhh! So cute!


http://www.girlcharlee.com/pink-peach-black-leopard-spot-cotton-spandex-blend-knit-fabric-p-13233.html

Okay there are a bazillion ways to make a kitty cat costume, I'm sure.
So I tried to keep it simple and let the fabric be the star of the show.
I used three of my video tutorials for this ensemble:

How to make a T-shirt
How to make a Pair of Leggings
How to make a Knit Headband

SHIRT + LEGGINGS
I took a pair of leggings that Clara already had to create a pattern for a new pair of leggings.
Then I sewed a t-shirt using the same method (from the video above and THIS tutorial)
Because I mean....a whole out outfit out that same fabric?  Too much.  In a good kitty cat way.


TAIL
(refer to the images below):
• Cut a long strip of fabric and fold it in half lengthwise.
• Sew down one side and then curve your stitch around the bottom, so the bottom of the tail is round.  Do NOT sew the top closed.
• Use your finger to turn the whole thing right side out.
• Tuck the open ends under and sew a small piece of velcro to the top.
• Sew the other piece of velcro to the middle back waistband of the leggings, so you can remove the tail, if needed.   I knew the tail would bother her at school, while sitting down, so this was really helpful and easy to do.


EARS
• Begin making a headband as outlined in the video above, but don't sew the ends closed.
• For the ears, refer to my shape below.  I drew a small pattern piece and cut out two pieces from gray felt, "on the fold", so they were symmetrical on each side.
• With wrong sides of the fabric together, sew the felt onto a piece of the leopard fabric and trim the edges when you're done.  Now you have two ear pieces with felt on one side, leopard on the other.


• Take the first ear and bring the two "corners" into so they create an ear shape. 
• Use a needle and thread to hand sew the ends together and then sew the first ear onto the headband.  Sew enough stitches to secure it in place.
• Space the other ear a few inches down (it's best to try it on their head to see how the spacing looks) and hand sew the second ear in place as well.
• Fold the edges of one of the headband ends under, and tuck the other end inside. Sew the headband closed with a topstitch.  
And you're done!
One pretty kitty.


Who also needs a nap.
...on dirty gravel.
Thanks mom.
Happy sewing friends!


Monday, October 10, 2016

Ask Dana: Using Felt Fabric

--------------------------------------------------------------------------
QUESTION:
Hi Dana!
I was wondering if you could share where you get your felt? We have such a pitiful selection of fabric stores in my area. I've ordered some from Magic Cabin, but it only comes in rather small pieces/sheets. Then I'll check a shi-shi site like Purl Soho and it's ridiculously expensive. The felt of your adorable cookies looks so nice- I'd love to know where you got it, since I know you're a logical human being who wouldn't spend $60/yard on felt.

Thanks!
Nat

ANSWER:
Thank you for finding me logical :). I definitely could never spend $60/yard on felt. But I can understand where you're coming from. So here's my not-so-secret, secret to buying felt....I get most of it at good old Joann Fabrics! But I don't buy the cheap pre-cut squares. I purchase the stuff sold by the yard on bolts. And the color selection varies from Joanns to Joanns, so larger stores will have a better color selection.
And I love questions like these because it's just the thing I cover in detail in my new book!
Here's a snippet of info to help you out...

BUYING FELT
Felt comes in roughly three categories:

* Cheap Acrylic , sold by the yard or in pre-cut squares at most craft and fabric stores. These are usually lower quality, some square-cuts are thin, and come in limited colors (mostly bright or simple pastels)
* 100% Wool. This is the finest wool possible. However, it can be pricey (about $18/yard). It's carried in some fabric shops, sold by the yard, and can be found in online shops, such as Wool Felt Central. They have every shade imaginable!! It's lovely
* Blended Wool. This is my favorite. It's a blend of 100% wool and synthetic fibers of Polyester or Acrylic. The wool feels much nicer than the cheapy squares and costs about 1/2 the price as 100% wool, about $7-8/yard. Fabric shops such as Joanns carry some interesting jewel shades, even some Heathers which give the felt a richer look. They're sold by the yard and are definitely worth the extra cost (which can be countered with a 40% off coupon!)

Thursday, September 29, 2016

Decorating the Master Bath...and that green chair

I really love our bathroom.
I know that sounds weird to say.  I don't mean the actual toilet part.  But more, the bright white paint, the morning light, and those awesome hot showers that really wake me up.  That's what I love.

In fact some of my best ideas come to me in the shower (TMI?).  Sometimes I even "type" out blog posts in my head!   Now you really know too much about me.  But I'm sure many of you can relate.  We're busy moms, with ten people needing our attention at once, we're making lunches, getting kids to school.  I guess the bathroom is sort of my "home away from home"?
I just savor those few moments of peace and quiet, without any distractions, to clear my head and think through a project.  


The only problem with the bathroom is that it needs a little sprucing up.
Other than the green tile (which I still love) and white cabinets, not much has changed since we built the house.  It's really a blank slate.


So for this post, I'm partnering with HomeGoods to add some decor to my favorite morning spot.  Because who doesn't like shopping there??   It's like a treasure hunt whenever I pop in---something new every time!

HomeGoods asked me to find some items from my local store to make the bathroom feel more "like me".   So with that in mind, I went shopping!

And boom. Straight out of the gates, I found these:
And. I. Love. Them.


I mean, is it possible to get really excited about towels??

I didn't think so, until I saw them....and fell in love....and bought all the towels in the store (sorry local Austinites.  You can blame me for hoarding).   I just love that color combo!  So unique.  Maybe I need more so I can use them as "fabric"---a beach robeChanging pad cover?  A beach cover up?
Totally.

So when I showed them to Casey (who btw, has been asking me to buy towels forever.  We've had the same ones for a long time and they badly needed to be replaced. So two weeks ago he threw them away to inspire me to buy new ones.  Good move).
Well I asked "aren't these towels fun?!"
"Um.  Yea. They're a little crazy."
And I was like,


"....they're super cool!  And with all that white in the bathroom they're going to look awesome."
"Hey, I just want a towel, so whatever you want is great."

I'll take that as a YES.
He likes them.

And I think that when it comes to decorating, you need to find that one item that inspires you for the room....whether it's the couch in the living room, or a piece of artwork, of in this case---towels!
Hooray! A colorful theme, mixed with lots of white. 

I purchased a few other items from the store too and went home to decorate.


And there you go.
A more lively improvement! 


Hooray for that little bench area between the two sinks.
The bathroom is also one of my favorite spots because it's where Casey and I have many morning conversations...from politics, to religion, to rehashing zombie shows from the night before.  Often while he's shaving I like to sit on that little bench area.  But it's uncomfortable to lean back due to the windowsill.  But no more!
3 pillows for the win.

And, drumroll for Casey....
New towels hung!
Fantastic right??


Aside from those colors, I'm really love the texture too.  What a cool way to do the piling on the towels, in little pods.
Okay I'll stop going on and on about towels.
Instead I'll gloat over yummy soaps and lotions.

Don't you love that at HomeGoods too?  There's always an aisle of amazing sounding (and smelling) bath things.  I'm a big sucker for cute packaging.  And if something says:


then I probably need it.

...along with Mango-Coconut lotion.
This stuff smells like tropical drinks on a private island.
Not exaggerating.
I'll wear it next time I see you.


And finally, just as I was ready to leave the store with my cute bathroom decor, I spotted this:


(ahhhh! Yes!)....which is really what I love about HomeGoods.  You can go there two days in a row and find something new each time.
In fact while prepping this post, I made two trips to HomeGoods, a week apart from each other.  On the first trip I spotted a gorgeous mid-century, navy tweed chair (a bit chunkier than this one), which I thought and thought about buying but decided to wait.  Then on the second trip, this green chair had shown up!  And I snagged it.   It's the perfect color of green with those tiles in the bathroom.

So. now it's hanging out in our master bedroom, which is really just an extension of the bathroom, and the zombie conversations.


Thank you HomeGoods!
I love my spruced up bathroom!
It's amazing how just a few items can liven up a space. 


Are you itching to go shopping now??


Today we're giving away....

Thursday, September 22, 2016

Boardwalk Blog Party: that pillow, 2 quilts, and a family of clothes


This pillow blows my mind.
I mean, I know how to sew.
Yes.
But I don't even know where to start with that!

This is definitely more in my comfort zone:
And I wish I could take credit for the darling ensemble.
The shirt is called the Clara top! (by Cassie) Need I say more?
I love it all.

If you missed any of my previous posts here, here, and here....we're having a blog party to celebrate my first fabric collection Boardwalk Delight with Art Gallery Fabrics
Technically, this is the final Boardwalk Delight Blog Party roundup.
Buuuuut, don't fret.  I'll keep sharing posts as more projects come in.  So keep tagging them in #boardwalkdelightfabrics on Instagram.

And, let's talk about that pillow.

If you follow Modern Handcraft you know that Nicole is kind of a master at these hexie things.
In fact she just released a pattern for the pillow here.  They're so cool.

And the funny thing is, I originally contacted her to make a quilt for my Quilt Market booth.  Which turned out so cute.  It's called the Picnic Quilt and you can see full pictures of it here.


But then when she was done with the quilt she asked, I have extra fabric so do you want me to make a Hexie Pillow too?
Ummmm.
YES.
Thank you Nicole!


Next up in the quilting world, the ladies from Simple Simon used some of my favorite prints to make this beauty:


Oh that quilt just makes me happy!  So fresh, so clean, and so easy to make (you'll find the pattern here).   This orangey Twinkle Lights fabric is one of the most simple fabrics in the collection, but holy cow I stewed over the proper shade of "tangerine" forever.  Then when I saw it in-person for the first time I realized, it's totally orange sherbet!
Which makes for a lovely photo backdrop...


And how about that ice cream shirt? (by Alexis)
So many cool details.  You can see more photos in the BWD Look Book.
And I've shared about this ensemble once before.

But dude.
This deserves more air time:


LOVE.
This group of clothes is totally what I pictured in my head while designing these prints.
Simple, yet fun and colorful.
Cassie and Alexis did a fantastic job of picking prints and patterns and taking awesome photos of course.

Those "sailor pants" in the turquoise Busy Beach print are one of my favorites.
And that print was a fun one to design.  I was inspired by the monochromatic line-art style on drink cups at Chipotle!....which we frequent more often than we should.  So I tried my own version of it, drawing all the things I love about the boardwalk and the beach.

Of course the originally drawings have 10 different color options.
And I thought that white with blue lines would be the winner, until I saw the colors swapped and loved it even more!

This print gives me happy vibes.
And look how Miranda used it for her little Plum.

She calls it a Four Seasons Romper.
So much fun!  The fabric shade is the perfect compliment to that gorgeous hair.
Cute cute Miranda!

And finally (Wow. This party is going all night)
THE Katy Dill asked if I could send her fabrics from the entire collection, so she could make clothes for ALL of her kids!


She and I both laughed, wondering if it could be done.
But in true Katy form, she pulled it off, with all the details, the pockets, and 40 buttons.


Oh Katy.  You make the world a happier place.


This photo!
And those Eat-it-All jammies on Drummer!
Go see-it-all


And that's a Boardwalk Delight Blog Party wrap!
I'll create buttons and a landing page to make it easier to find these projects in the future.
And I'll keep sharing more as we make more!

You can buy Boardwalk Delight Fabrics in your many online shops and in your local fabric shop.
Check out links in my post here.
Or look at the awesome list of shops on the Art Gallery site.  Click the "shop" icon (they have international shop links too)