Friday, April 11, 2014

I'm recovering my chairs....I need your help!


Remember when I made these oilcloth covers for my Ikea stools?  Back when my kids were BABIES?  I mean, wow.  Is that really Lucy?  I guess a girl can grow up in four years.

Yep, that's how long ago I made these!  They're as old as my laptop, and our first Celebrate the BOY with Rae.  Funny how life's timeline is referenced by blog posts and projects.

Well over the years some of you have emailed asking how the covers are holding up.  And you know what, until a year ago they were fantastic!...but then they got a small rip....and baby Clara made it her favorite pastime to peel and pick at the fabric.  I guess it's payback time for the years we kids scratched at my mom's velvet-embossed wallpaper in the downstairs bathroom.   Sorry mom.

So the stools need new covers.  And since we've increased our island space in the new house, we now have six stools.  I'm ready to tackle the project!
I've been brainstorming other water-resistant options to use besides Oilcloth....like vinyl (too thick), laminated cotton (won't hold up as well), tablecloths (might tear within a year)....and so I just keep coming back to Oilcloth!  I love love love that these covers are super kid friendly.  I never have to stress over them spilling food because I can just wipe it up.  And using the original Ikea slipcovers as pattern pieces for new covers makes the process pretty easy--read all about the details here.

So Oilcloth it is.  I scoured my favorite oilcloth sites here and here and ordered five different prints from Oilcloth by the Yard.  They were awesome.  Great fabric selection, speedy shipping, and it came rolled up in a tube!  I don't know if that's standard with all shipments but I was pretty happy about that.  Wrinkle free!
And here's what we have:
Corn Flower YellowCorn Flower OrangeFat Stripe YellowSunflower Stripe Yellow
Now I need your help deciding which to use!
Here's what I'm thinking....

As much as I've loved these orange chairs, and as great as they look against the blue backsplash, I'm ready for change.  So I think the orange is out, for this particular room at least.
Now, stripes would be the expected thing to do.
And this would be the sensible thing to do.  The yellow coordinates well, it's cohesive with everything in the room.
But you know what I really want to do??
THIS!  Am I crazy??
Seriously.  I feel like sunflowers are so not me.
But every time I pull that print out I just get happy!  And it makes me excited to sew.
It limits me a bit with the rest of the decor in the room....but on the flip side, it makes the room.  It'll get people's attention when they walk in the door.  I like that.

And you know what, it also reminds me of my grandma's old house in Arizona, which had a floral print in the kitchen and sunflower wallpaper in the bedroom.   
Oh Granner, you were so adorable.  You even made tomato soup look classy. 
So.
What should I do?
I've placed 6 yards of sunflower fabric in my cart and just can't hit "purchase". Which print would you pick???

Wednesday, April 9, 2014

Skirt with a Sash


My favorite item of clothing to sew for any girl is a skirt because there are so many ways to mix it up.
And with cooler weather coming, this version is a fun (and easy) way to dress-up for a holiday party, a Fall wedding, or just a day out shopping with mom.

It's a skirt with a sash!
....a sash that can be tied in a bow, tied in a knot, tied in the front or in the back.
It gives the skirt that perfect bit of character and charm. And, it will impress your friends as they admire your sewing skills. Because although it might look tricky, it's actually quite easy to make.
Of course the other reason I love sewing skirts is that they're a quick-sew.  With little effort you can make a really cute skirt and then pair it with a store-bought shirt. 
Here are some versions we've tried so far (click a button below for the full tutorial):

http://www.danamadeit.com/2014/05/tutorial-sparkle-skirts-with-a-simple-satin-lining.html http://www.danamadeit.com/2014/05/tutorial-sparkle-skirts-with-a-simple-satin-lining.html

Let's get started!

This Skirt with a Sash takes either the Simple Skirt or a Lined Skirt and adds a sash on each side of the waistband.  Of course this sash can be added to any basic skirt.  So if you've sewn a skirt before just keep on reading.  And if you've never made a skirt, I recommend reading through those tutorials first.


The Satin-Lined Skirt tutorial shows you how to add a satin lining and separate waistband for your skirt. which is what we'll be making here.


Here's what you need:
Fabric Types:
You can use a variety of fabrics  - cotton, satin, lace, chiffon, knits.
For my particular skirt, I used lace for the outer, satin for the lining, and satin for the waistband and sash.

Elastic Type:
I prefer Braid elastic because it tends to not roll-up inside the waistband the way other elastics might.  You can use 1-inch or 2-inch wide elastic.  For this skirt I used 2-inch wide to give the waistband a chunky look.

The Concept:
We're going to create two sash pieces, sew them into a separate waistband at the side seams, sew the waistband on to the skirt, and string elastic through the waistband.  So, we need to cut two separate waistband pieces and two sash pieces.

Cutting and Sizing
Refer to the Simple or Lined skirt tutorials for details on measuring and cutting basic skirt pieces, then cut the following....

• Waistband
First you need to decide if you're using 1-inch or 2-inch wide elastic.
If you're using 2-inch elastic, the width of your waistband pieces should be cut 5.5 inches wide (2 inches for one side of the elastic + 2 inches for the other side + 3/4  inches at the edge to iron under + 3/4 inches at the other edge).
If you're using 1-inch wide elastic, cut your pieces 3.5 inches wide (1 + 1 + 3/4 + 3/4 inches)

The length of each waistband piece should be the same as your basic skirt pieces.  In a nutshell: measure your waist, multiply it by 2 or 2.5 or 3 (depending on how full you want your skirt to be) then divide that in half.  This is the length for each waistband piece.

So for my daughter, I'm going to make a skirt 2.5 times her waist size.  She has a 20 inch waist so I need to cut TWO waistband pieces that are 5.5 x 25 inches. 

• Sash pieces
For 2-inch wide elastic in the waistband, cut the Sash pieces 2 + 2 + 1/2 + 1/2 inches, or 5 inches wide.
For 1-inch wide elastic in the waistband, cut the Sash pieces 1 + 1 + 1/2 + 1/2 inches, or 3 inches wide.

For the length of each sash piece, take 1/4 of your waist measurement and then add approximately 25 inches (there's some wiggle room with that measurement so you have extra length to tie the bow on the skirt.  We'll cut off the excess in later steps).

So for my daughter with a 20 inch waist I need to cut TWO sash pieces that are 5 x 30 inches.

Okay, we're ready to SEW!


Tuesday, April 8, 2014

First Day Dress update


Many of you have emailed asking..."When will the First Day Dress and Top pattern) be ready?"
I'm so happy you haven't forgotten about it!
I haven't either.
It's at the top, of the top, of my MADE to-do list.
And I promise I don't mean to string to you along. 
But here's the reality of blogging and being a one-person show....

Everything takes longer than I think.
I love blogging and sharing and creating.  It really brings me joy!...and mostly because I'm sharing it with you and I love to see your excitement about making things from the patterns and tutorials I've created!  So I feel a real obligation to you guys to deliver on the ideas I've talked about.  And that's always my intention.  So thank you for your patience as I do my best. 

So.  Will the dress pattern be ready for Easter?
Sadly, I don't think so.
Will it be ready some time before Summer?  YES, that's the plan!

Between the new home and kid-life, we MUST make it happen.
Cause there are two little girls over here that'll be happy if it does.

So thank you for your support friends!
And please continue to email me with your questions.  I love to hear from you.


Friday, April 4, 2014

Building a new home: tile, flooring, countertops, and color


It's time for a new-house update!
And even though we're now living in the home, I really want to document it all systematically.  So today we're talking about flooring and tile. 

If you’ve missed my other posts, our family is building a custom home in the Austin, TX area.  We’re not physically building it ourselves—we’ve hired a custom builder to do the hard part and we’re along for the decision-making ride.

Check out my previous posts documenting the whole process:
We’re building a new home!
Groundbreaking Party
From foundation to frame 
Stucco, shingles, and a pretty paint job 
Sheetrock, paint, and a double-decker deck
We moved!...and an ode to the old house

When we last visited the house it looked like this:
The cabinets had just gone in!
And, I love them.  I knew I wanted white cabinets from the very get-go...but I also knew that I wanted white stone countertops.  And I worried that it would be a lot of white (for anyone else in the house, who's name is not Dana....because I would be perfectly content to live in a house dipped in marshmallow goo).
But.  As it all came together with the cabinets, counters, flooring, and pops of colored tile throughout the house,  I absolutely love it.  And Casey does too....so let me show you what we did.

First off, the wood floors.
Haah.
Okay. They're not wood.  They're tile!
And they're really amazing.
Now before you scoff at the tile---like I may have done when our designer first showed it to me---let me tell you the pros and cons.
I really love wood floors.  In our old house we had very light wood maple floors made of engineered wood---which is the most common type of wood flooring these days.   Typically there's an engineered wood like mdf on the bottom, and then a thin layer of real wood on the top, which you tongue + groove into place in large pre-pieced boards (or in individual planks like old fashioned wood floors).
So I had my heart set on wood floors again.  They're just warm and inviting.  Yes, after 4 years in our old house the floors were scratched up in many places.   But nothing bad; just wear and tear.
So when I met with our designer to pick out flooring the first thing she said was, "I have a vision for your whole house.....and I found the perfect tile flooring that I think you're going to love."
I inwardly rolled my eyes.
("I'm not doing tile")
And then she pulled out this beautiful long 36x6 inch porcelain tile that had a really cool natural farm house look to it.  It wasn't really brown.....it was like a warm gray/brown and matched my favorite boots perfectly.  And it had some texture on the top that made it feel like wood, and the pieces were all varied so it wasn't matchy matchy.  And then she showed me the flooring laid out in the showroom.
And, I was totally on-board.
It was really beautiful!  And the upside to using tile vs. wood is that we could use it throughout almost the entire house....which makes a home feel larger and more cohesive.  We could use it in the kitchen, laundry room, the bathrooms, everywhere! (although we planned to use carpet in the bedrooms).  Plus, the tile doesn't scratch which is truly amazing.  Drag chairs around in the house, no prob.
We've been living on these tile floors for a month now and the only downside I see---compared to wood floors--is that it doesn't have that same warmth as real wood.  I just gotta be honest about that.  Some winter days I miss that rich feeling of walking on wood.  But when summer hits, these tile floors are going to be my best friend.
So really, no complaints. 

Now there's a range of wood tile out there from pricey to inexpensive and some of it (in my opinion) can look a bit plasticy.  Wood tile is still on the early trend so I can only imagine that over the next 10 years there will be many more options to choose from....like bullnose tile pieces for the stairs (but we'll get to that in a moment).

This particular tile is by Marazzi and the style is Cambridge Oak, Natural color.  Check out all sorts of flooring options on my pinterest board here.  The cost was the same as doing real wood floors, so it wasn't cheap.  But I found that with home building you have to decide which big ticket items are important to you, and you cut back on the ones that aren't (and plan on going over budget a bit.....which is just the reality.)

Our tile guys were awesome and worked hard, around the clock for a few weeks.  I was actually surprised at how long it took but was glad to know that there was a lot of precision work going into it.  They'd point out small inconsistencies to me and ask, "in order to make this all fit, I had to move this one tile over 1/8 of an inch.   Is that okay?"  The artist in me appreciated that attention to detail and pride in their own work.
Little by little, the stairs went from this:
to this (with the walls painted Repose Gray):
And deciding exactly HOW the tile should look on the stairs led to much discussion.
I knew I wanted "wood" tops with white risers.   But the problem with tile vs wood is that there wasn't a bullnose piece to go on the stair edge.  And I didn't want the tile to look cheap and small on top---I wanted it to be chunky like wood.  So the tile guys created a rounded edge on-site and placed a small tile piece on the stair front, and it totally worked.  I'm happy with the finished look.
Sick of talking about tile yet?
Oh good, cause now it's going to get colorful!

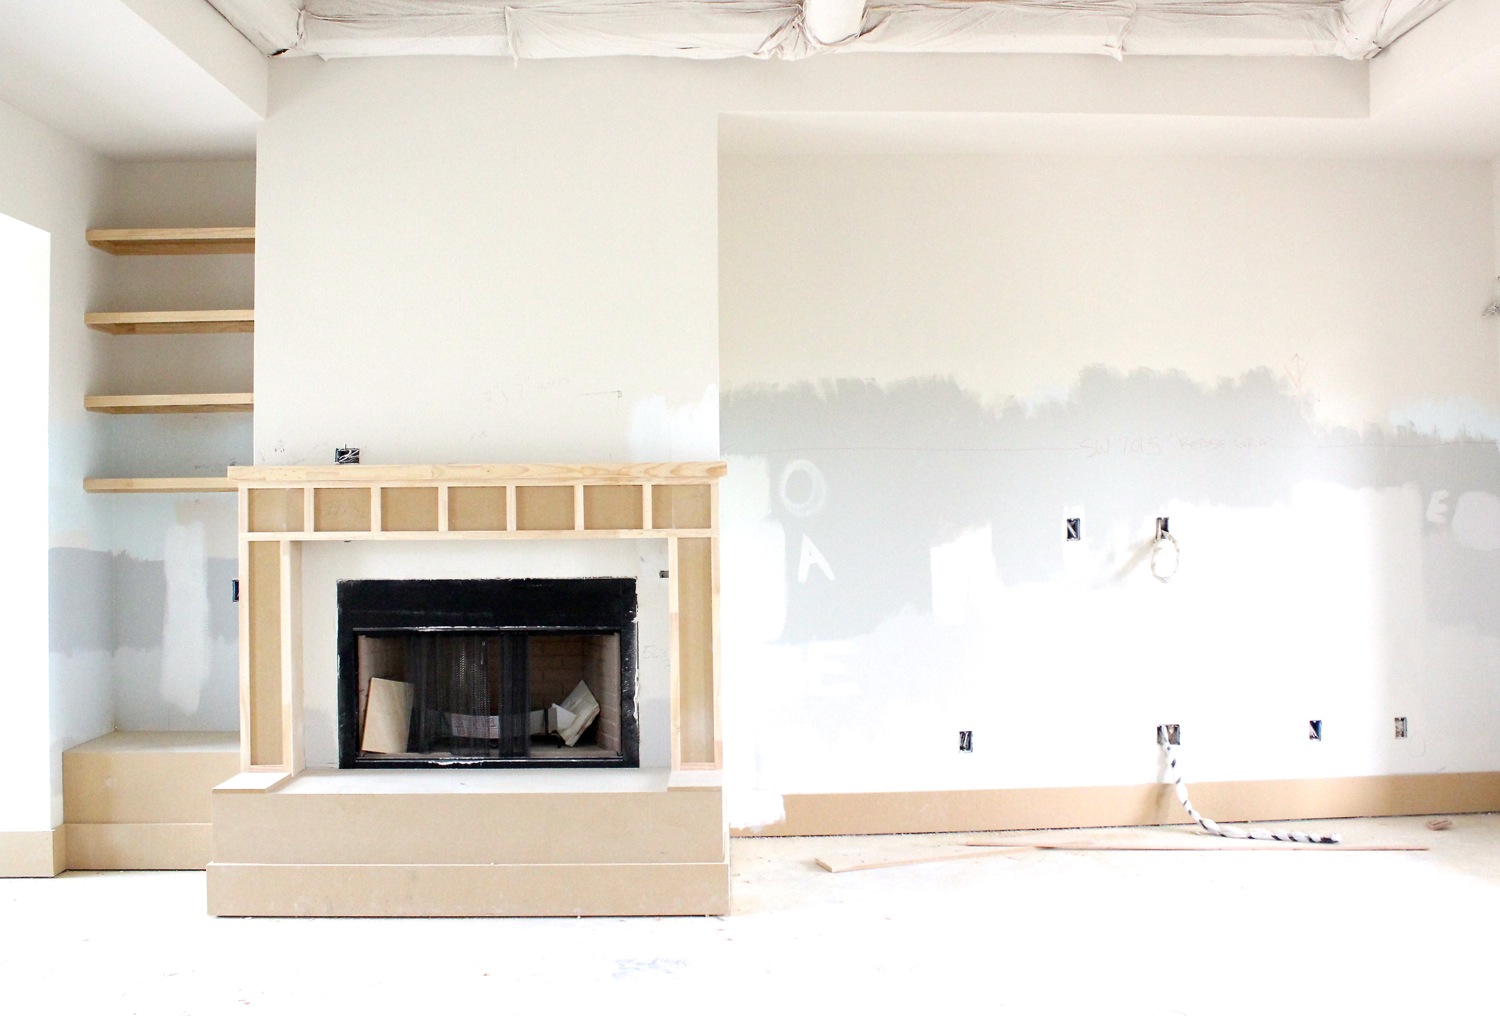
The great room once looked like this:
And now it looks like this!
For the fireplace I selected a 1x1 tile by Daltile, color: Spa Blue.
I'm so in love with this shade.  It's soothing and subtle.
And it's pretty close to the photo I used as inspiration. 
Definitely a more finished look from our Christmas card photos. 
For more ideas check out my fireplace board here.

In two of the bathrooms, we went with a neutral gray color on the floors, in large 12 x 24 tiles
And then on the walls we threw in the color.
Green!
I never used green in our old house but with this house I'm bringing it in....starting with the Master Bath and the front door. 
Did mention it was green?
I love it.
I guess the tile guy wanted to fit in too because he brought a green apple to work every day and placed right there on the shower ledge.  Made me smile. 
One day I asked what he thought of the bright green tile and he said, "well, it's going to give you lots of energy in the morning!"  I like that perspective---it's the energy shower!

For most of the showers in the house we used Interceramic tiles in Bold Tones, size 6x6, in a broken joint pattern.  This color is: Limelight.
We selected white 2x2 tiles for the tub splash and the floor of the green shower.
And it finally came together!
ENERGY:
For the downstairs bathroom we used Dark Gray from the same tile series.
We added an exterior door to this bathroom in case we build pool, for outside access.
Upstairs we used Gulf Blue tile.
And the shower went from this:
to this! (more photos in the Dropcloth Shower curtain post)
All the bedrooms got a pretty layer of carpet:
In the Master bedroom all three flooring types come together.
And on the upper deck we selected tile over wood so it would be waterproof for the deck below.
We continued a small patch of the same tile into the playroom and guest room--which open to the upper deck--to keep the carpet from getting dirty near the doors.
Phew.
Still with me?
The flooring is done!

Just one final bit to share: the kitchen counter and backsplash.

It's fun to watch your house being built but, it can also give you anxiety....like the day I pulled up in pouring rain and three guys jimmied that heavy slab of Silestone into the house.
("please don't drop it, please don't drop it")
They got it in place!
Now the tile guys could finish the backsplash. 
We used American Olean Legacy Brick Subway, color: LG02 Hazel and it makes the room so cheery!
I really love this shade of blue.
And that my friends, is one BIG long blog post.
Thanks for reading.
And have a great weekend!
Next time I'll show you some pretty interior details.