Friday, October 28, 2016

How to be Nick Wilde the Fox from Zootopia


Owen is a pretty funny kid.
In groups and social scenes, he's somewhat quiet and shy.
But ask him to dance or model for photos?....and he totally hams it up.

In fact he wasn't an ounce embarrassed to be walking the streets dressed like a fox, with mom and camera close behind. 


Like Nick Wilde, I think he enjoyed the attention of owning the moment.
Haah.
What a guy.


Oh, this fox head was so much fun to make.  And could be used for so many different animals ---- bear, pig, bunny, elephant.

The best moment of the season is when Owen walked in the room and saw the finished fox head and bellowed out, "EPIC!"  Haha. 
Making Halloween dreams come true for everyone.

Now, in all honesty when Owen said he wanted to be Nick the fox from Zootopia, I first looked on Amazon so I could click and purchase a costume.  I'm kind of in that "we can only make one kid's halloween costume a year" mode.
But I was totally unimpressed with what I saw.  The costumes were all those onesie type things, where the shirt and pants are attached and the whole thing velcros in the back?
No gracias.

So we put together our own look, with the fox head being the star.


SHIRT:

You'd be surprised how hard it is to find a green shirt!  So....RIT Dye to the rescue. 

• I found a white cotton shirt at Old Navy and dyed it in a bowl in my sink, using this liquid Apple Green dye.  His shirt in the movie is actually a green print with palm leaves, but this was close enough. Make sure your shirt is 100% cotton or it might not dye properly (see next bullet point)

Use my tutorial here for info on dying fabric and elastic.


NECKTIE:
 It's also hard to find simple blue/pink striped fabric. So....

• I cut out a tie using my Everyday Necktie Pattern, in navy blue fabric.  
• I sewed skinny satin ribbon to the fabric to create the stripes, spacing them about an inch apart.  I just used the width of my ruler to help guide me.  I sewed the ribbon the whole length of the outer tie fabric (it didn't take as long as you would think).   And I actually love how it turned out.  The satin makes the cotton fabric feel a bit "fancy".  I might have to try this technique for reals on other ties.

FOX HEAD AND TAIL:

As I mentioned above, the real star of this costume is the head----kind of like adding a yarn wig to your ensemble.
I'll have to do a full tutorial for this later.  But here are some photos to get you started:

• I used the same concept as the Bat Costumes, Kitty Cat Costume, and the hood in the Beach Robe Pattern.
• I used white faux fur for the outer head and orange cotton fabric for the lining.
• I drafted my own patterns and sewed everything first.  Then I spray-painted everything with orange paint.
• For the tail, I added stuffing and bunch of floral wire stems so the tail could bend and stick out.
• Once the orange paint dried, I used black spray paint to add some accents.
• Then I sewed the ears to the head (similar to the Cat and Bat costumes)
• I added two ties at the bottom of the hood so it would stay on his head (but this is optional.  It would have stayed on without the straps also).  I used pieces of bias tape with velcro attached.

And there you go!
Hat and tail ready to go.


(And, another goofball who likes to get into character.
The moves were all her own.  I merely asked her to try it on for size. )


• The tail is attached to the back waistband of the pants with a couple safety pins.


I pinned the tail from underneath...meaning: when you're pinning, hold the tail UP toward the shirt, then when you flip it over it helps it to stick out more.  

Then throw on your brown pants and make your sly way to the party. 


Happy Halloween from Willardtopia!
Have a festive weekend!


Monday, October 24, 2016

Mini Key Lime Pies


The holiday season is coming....which means, time to make pie!
Or many pies.
Or MINI pies.

YES.  I love pie!
And I asked Owen to help me with the recipe because he loves pie too.
Really, he just loves to bake.  Isn't it fun when you start seeing real interests in your children?  Just last Sunday, out of the blue he asked if we could make Peach Cobbler.  Um, sure!
He's also helped me make Pumpkin Pie.  And now we'll add this to his resume as well. 


Daisy Sour Cream asked me to share a holiday recipe with you. And it was a no-brainer:
MINI KEY LIME PIES

Lime + Sour cream + and mini pie tins?
Who doesn't love mini things??

And with the Daisy Squeeze bottle, this recipe is super easy for kids to help out.  Have you seen those bottles?  Brilliant.  I keep thinking of all the chili pot-lucks we've been to over the years, and how fantastic it would be to have a Daisy Squeeze Sour Cream like that!

Okay let's get squeezing....


MINI KEY LIME PIES
(makes 12 mini pies or one standard pie)

1 cup sugar
3 Tbl corn starch

1/4 cup melted butter (and somewhat cooled)
1 Tbl zested lime rind
1 cup lowfat milk
1/4 cup fresh lime juice
3 egg yolks, slightly beaten

1 cup (8 oz) of Daisy Brand Sour Cream


• Combine sugar and cornstarch in a stove-top pan.
• Mix in the rest of the ingredients EXCEPT the sour cream.
• Cook over low to medium heat, stirring constantly until thick.
• Allow the mixture to cool.

Then comes the fun part.
Squeeze in the Daisy Sour Cream.
And as any 8 year-old boy would do, inspect the contraption to see how this amazing invention works.

For the recipe you need 1 cup of sour cream, which is approximately 1/2 of these squeeze top bottles.  I just told Owen to squeeze in about half of it---you don't need to be precise.
And I love that there the squeeze top meant one less thing to clean.


Then fill those mini pie tins on up!


Top them with a bit of whipped cream and a sprinkle of lime rind.
And smile at how amazing your house smells.
Chill them till you're ready to eat.
 

These can be made one day ahead, but I wouldn't do more than that or the crust will get soft.  And if you're asked to bring them a baby shower.....double or triple the recipe. And pull out the big trays.


Okay, want to make your own pies for the holidays??  With Daisy Squeeze Sour Cream?
Tell me in the comments, what's your favorite holiday tradition?....

Wednesday, October 19, 2016

How to make a Leopard Kitty Cat Costume


When Clara told me she wanted to be a cat for Halloween I did the internal eye roll.
Really?
A cat?
Does it get more cliche or ((boring?)) or blah blah blah?
I guess every girl wants to be a cat at some point in her life?....

But then I realized how ridiculous I was being, because Clara LOVES cats. They're her absolute favorite animal and she sleeps with 3 stuffed kitties every night.


So of course she should be a cat!
And how stinking cute would a Clara Cat look?
AND....what if we made it a leopard cat?
Okay.
I was totally on board.


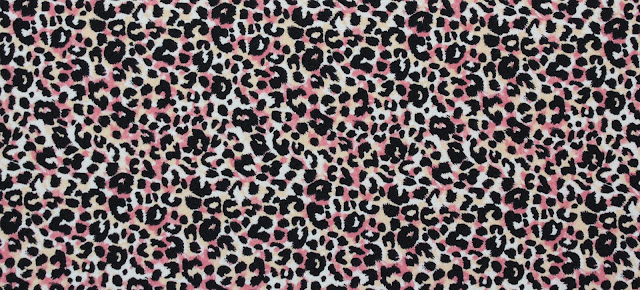
Just having an excuse to buy leopard knit spandex made me happy.
And guess what?? There are some great choices at Girl Charlie.  Can you imagine a whole "family" of little girls in different leopard prints?!
Clara and I picked our favorite---pink, peach, + black.
Ahhh! So cute!


http://www.girlcharlee.com/pink-peach-black-leopard-spot-cotton-spandex-blend-knit-fabric-p-13233.html

Okay there are a bazillion ways to make a kitty cat costume, I'm sure.
So I tried to keep it simple and let the fabric be the star of the show.
I used three of my video tutorials for this ensemble:

How to make a T-shirt
How to make a Pair of Leggings
How to make a Knit Headband

SHIRT + LEGGINGS
I took a pair of leggings that Clara already had to create a pattern for a new pair of leggings.
Then I sewed a t-shirt using the same method (from the video above and THIS tutorial)
Because I mean....a whole out outfit out that same fabric?  Too much.  In a good kitty cat way.


TAIL
(refer to the images below):
• Cut a long strip of fabric and fold it in half lengthwise.
• Sew down one side and then curve your stitch around the bottom, so the bottom of the tail is round.  Do NOT sew the top closed.
• Use your finger to turn the whole thing right side out.
• Tuck the open ends under and sew a small piece of velcro to the top.
• Sew the other piece of velcro to the middle back waistband of the leggings, so you can remove the tail, if needed.   I knew the tail would bother her at school, while sitting down, so this was really helpful and easy to do.


EARS
• Begin making a headband as outlined in the video above, but don't sew the ends closed.
• For the ears, refer to my shape below.  I drew a small pattern piece and cut out two pieces from gray felt, "on the fold", so they were symmetrical on each side.
• With wrong sides of the fabric together, sew the felt onto a piece of the leopard fabric and trim the edges when you're done.  Now you have two ear pieces with felt on one side, leopard on the other.


• Take the first ear and bring the two "corners" into so they create an ear shape. 
• Use a needle and thread to hand sew the ends together and then sew the first ear onto the headband.  Sew enough stitches to secure it in place.
• Space the other ear a few inches down (it's best to try it on their head to see how the spacing looks) and hand sew the second ear in place as well.
• Fold the edges of one of the headband ends under, and tuck the other end inside. Sew the headband closed with a topstitch.  
And you're done!
One pretty kitty.


Who also needs a nap.
...on dirty gravel.
Thanks mom.
Happy sewing friends!


Monday, October 10, 2016

Ask Dana: Using Felt Fabric

--------------------------------------------------------------------------
QUESTION:
Hi Dana!
I was wondering if you could share where you get your felt? We have such a pitiful selection of fabric stores in my area. I've ordered some from Magic Cabin, but it only comes in rather small pieces/sheets. Then I'll check a shi-shi site like Purl Soho and it's ridiculously expensive. The felt of your adorable cookies looks so nice- I'd love to know where you got it, since I know you're a logical human being who wouldn't spend $60/yard on felt.

Thanks!
Nat

ANSWER:
Thank you for finding me logical :). I definitely could never spend $60/yard on felt. But I can understand where you're coming from. So here's my not-so-secret, secret to buying felt....I get most of it at good old Joann Fabrics! But I don't buy the cheap pre-cut squares. I purchase the stuff sold by the yard on bolts. And the color selection varies from Joanns to Joanns, so larger stores will have a better color selection.
And I love questions like these because it's just the thing I cover in detail in my new book!
Here's a snippet of info to help you out...

BUYING FELT
Felt comes in roughly three categories:

* Cheap Acrylic , sold by the yard or in pre-cut squares at most craft and fabric stores. These are usually lower quality, some square-cuts are thin, and come in limited colors (mostly bright or simple pastels)
* 100% Wool. This is the finest wool possible. However, it can be pricey (about $18/yard). It's carried in some fabric shops, sold by the yard, and can be found in online shops, such as Wool Felt Central. They have every shade imaginable!! It's lovely
* Blended Wool. This is my favorite. It's a blend of 100% wool and synthetic fibers of Polyester or Acrylic. The wool feels much nicer than the cheapy squares and costs about 1/2 the price as 100% wool, about $7-8/yard. Fabric shops such as Joanns carry some interesting jewel shades, even some Heathers which give the felt a richer look. They're sold by the yard and are definitely worth the extra cost (which can be countered with a 40% off coupon!)