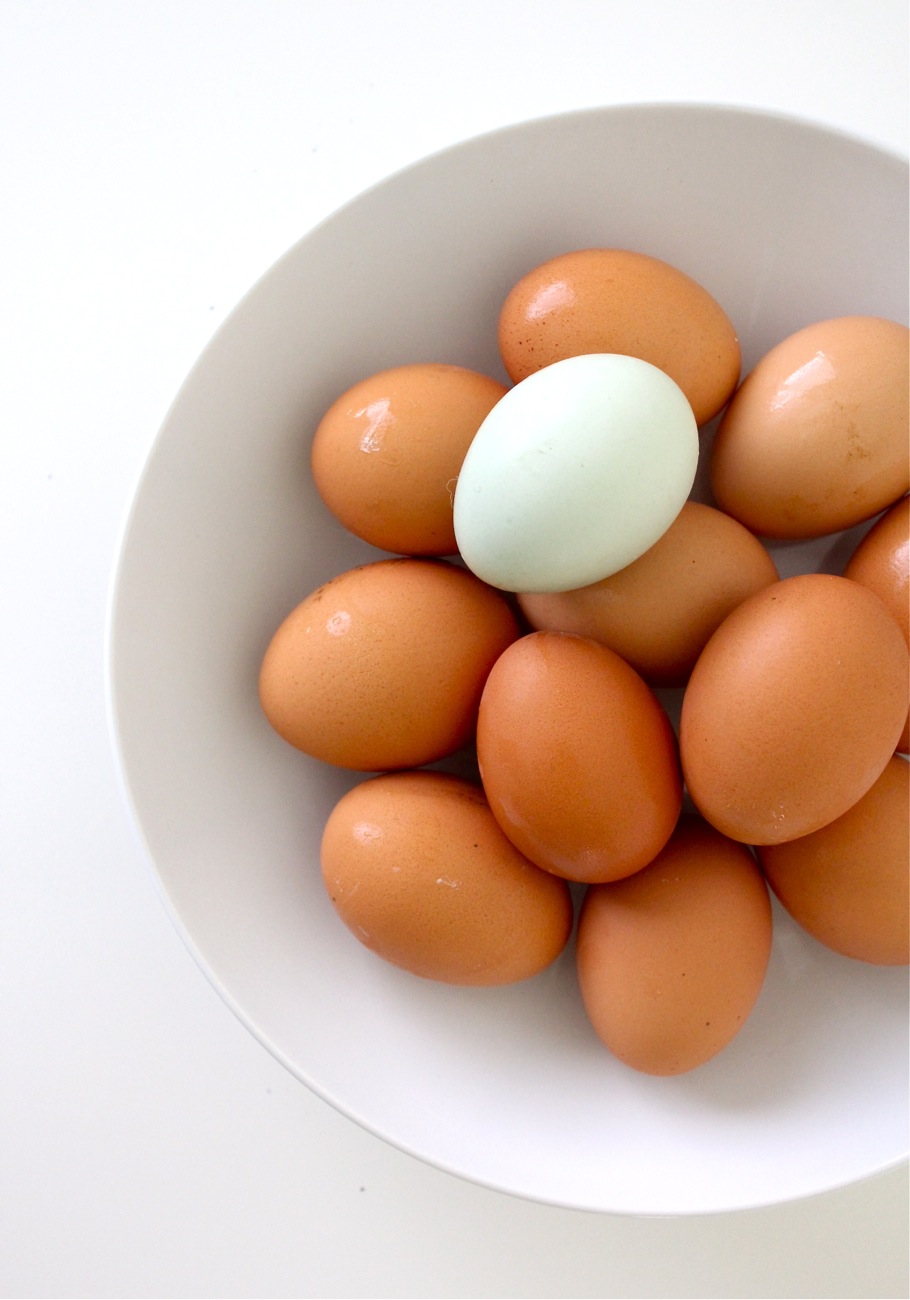
Our friends gave us fresh eggs from their chickens this week, and I couldn't stop taking pictures of them. They're gorgeous. They have little freckles!
They're almost too pretty to eat.
I suppose if I had fresh eggs every day I'd be used to the rich brown and pale, pale blue shades.
But since this is my first time having something other than white (Haah! Such a city girl. A city girl who's also never thought to actually buy farm fresh eggs from the store, duh)...well, these beauties were the perfect models for 2pm lighting in my house.
Owen loved them too.
And couldn't keep his hands off.
I went in the other room to get my camera and came back to find two eggs missing, and Owen crouched on the floor, nesting. "I'm getting ready to lay some eggs. Look! Orange and blue!" (he insists they are not brown eggs, but orange)
Either way, they're beautifully fun.
And just as cute as our little Easter egg from last year.
I can't believe this was really Clara. So small and such dark hair.
The only question is...what to make with the pretty fresh eggs? Probably this or this or maybe this.
Or maybe just a simple scrambled to get the full flavor effect. Or maybe I'll just keep taking pictures of them.
And if your house is like mine with an assortment of the plastic kind laying around.....
Remember not to throw them out when Easter is over !...so you can do this.
Have a eggcellen shakin day.
Wednesday, March 27, 2013
Tuesday, March 26, 2013
Bunny and Carrot Cupcake Toppers
This weekend we had an early Easter celebration with friends and I was asked to bring dessert. Heaven. In my world, we'd just skip dinner all together and move on to the treats. I guess if there are carrots involved it's sort of like dinner?
Glad we're on the same page.
So I started with my mom's Carrot Cake and Cream Cheese Frosting recipe, which also makes about 22-24 cupcakes. Follow the recipe in the link and bake them for about 18 mins.
While the cupcakes bake, I grabbed simple items from around the house and got crafty.
Who doesn't love a festive cupcake topper?!
Okay, pretty self-explanatory but here are some tips....
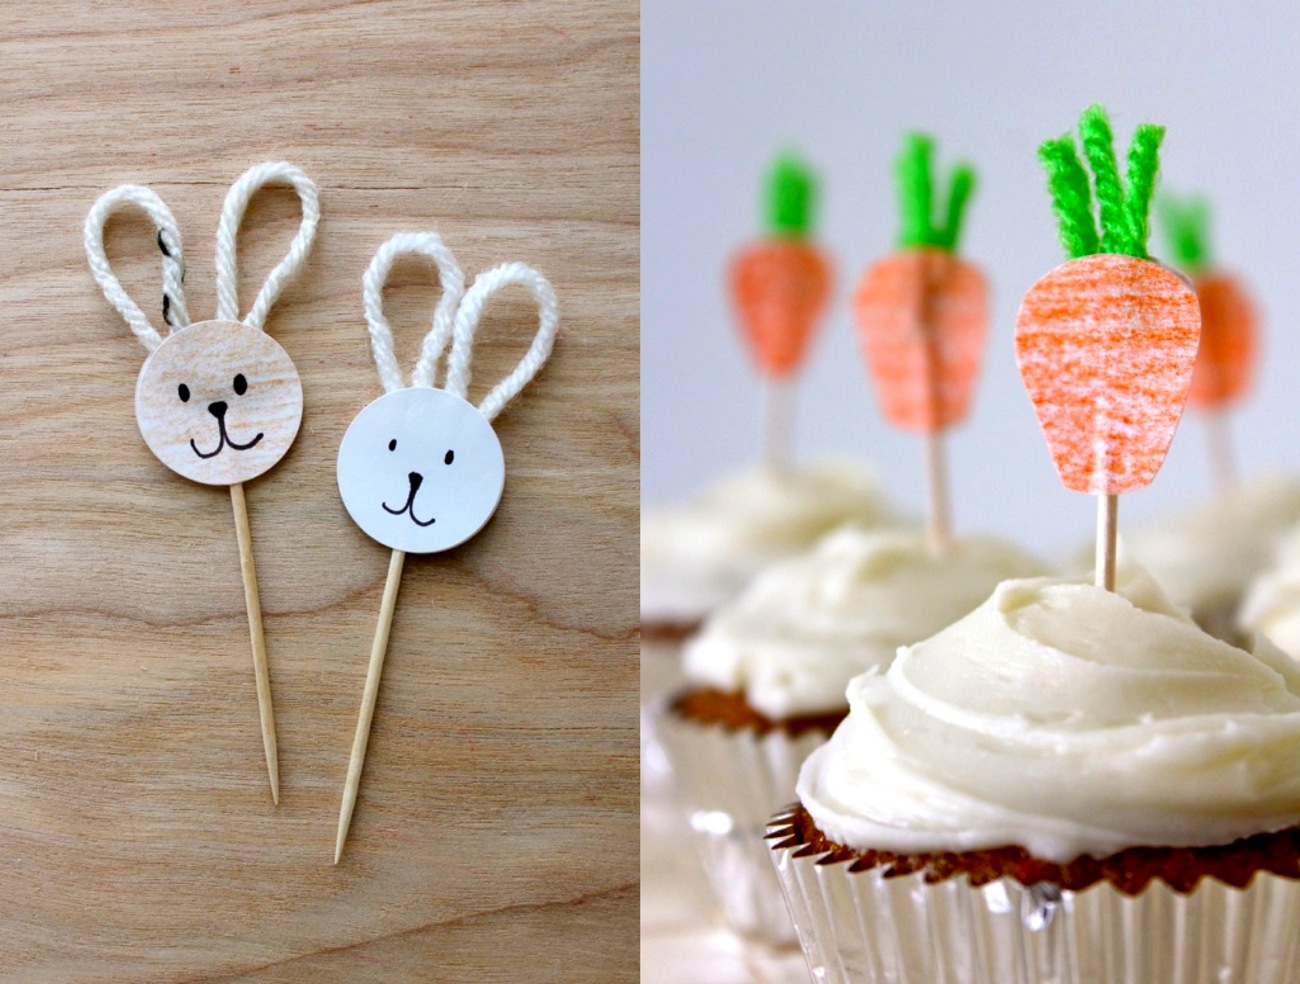
• Use a crayon to color the carrot circle stickers (you can also use orange stickers but I sorta like how the crayon makes it look grainy)
• Use three yarn strings for the carrots, sandwich them between two orange stickers, squeeze together, and cut the sides in an angle, like a carrot.
• Use a Sharpie or marker for bunny faces
• Cut each yarn ear about 2 1/2 -2 3/4 inches long.
• Make tan bunnies, black, whatever!
NOTE: some finished toppers pulled apart a bit from the bulky yarn in the middle. But overall they worked well and I just squeezed them together again before our party.
That's some easy gardening.
The kids wandered in while I was cutting and wanted to make bunnies too. So I let them draw their own and loved what they did.
Bunnies and Carrots!
Chomp, chomp.
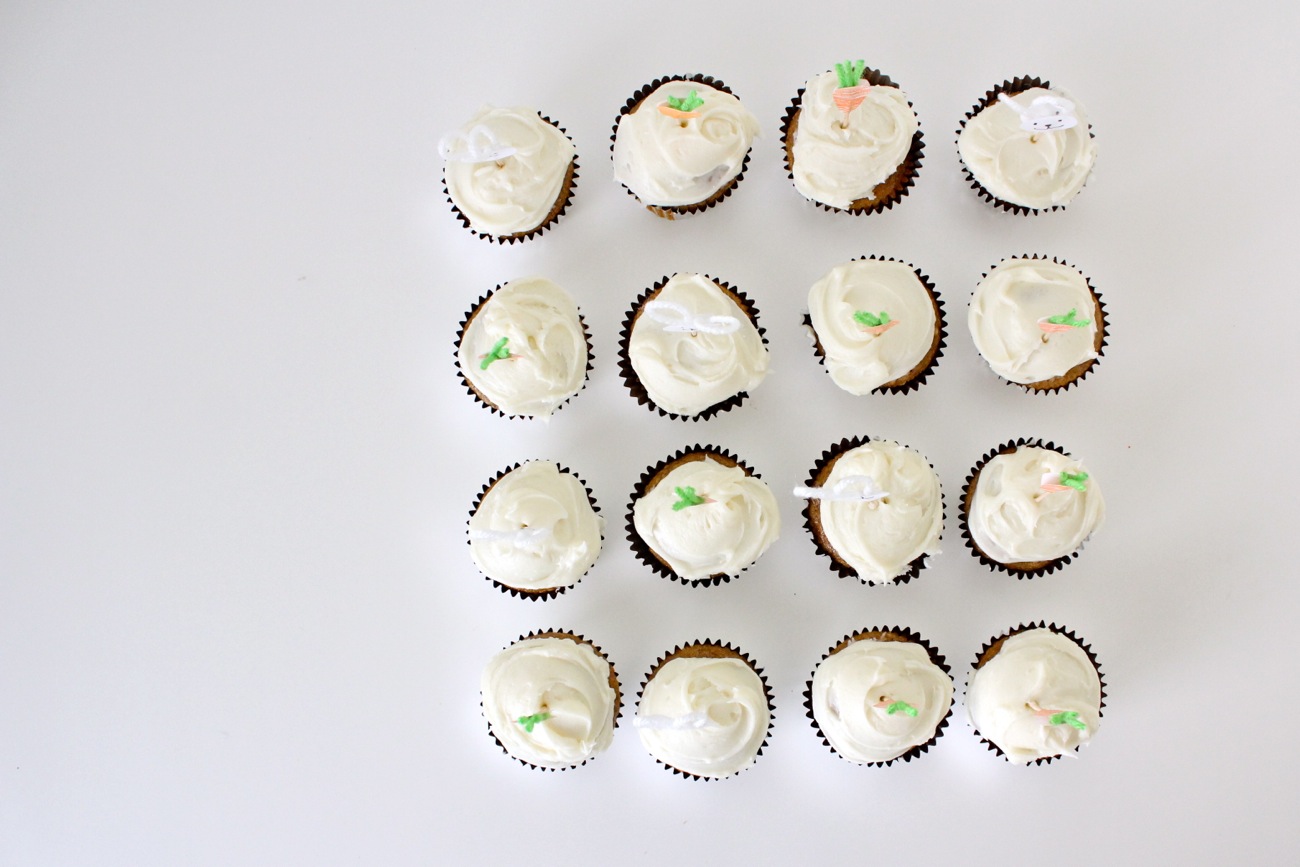
When the cupcakes were cooled and frosted we stuck in the Toppers.
Ready for the party!
And in case you're wondering what happened to those pretty orange cupcake liners I started with?....
I realized after pouring batter into all the cups that I'd forgotten to add the mil.
GRRRR.
So I squeezed the batter from every cup and had to go with the silver liners instead. No big deal but seriously how cute were those orange ones??
Happy Easter!
Glad we're on the same page.
So I started with my mom's Carrot Cake and Cream Cheese Frosting recipe, which also makes about 22-24 cupcakes. Follow the recipe in the link and bake them for about 18 mins.
While the cupcakes bake, I grabbed simple items from around the house and got crafty.
Who doesn't love a festive cupcake topper?!Okay, pretty self-explanatory but here are some tips....
• Use a crayon to color the carrot circle stickers (you can also use orange stickers but I sorta like how the crayon makes it look grainy)
• Use three yarn strings for the carrots, sandwich them between two orange stickers, squeeze together, and cut the sides in an angle, like a carrot.
• Use a Sharpie or marker for bunny faces
• Cut each yarn ear about 2 1/2 -2 3/4 inches long.
• Make tan bunnies, black, whatever!
NOTE: some finished toppers pulled apart a bit from the bulky yarn in the middle. But overall they worked well and I just squeezed them together again before our party.
That's some easy gardening.
The kids wandered in while I was cutting and wanted to make bunnies too. So I let them draw their own and loved what they did.
Bunnies and Carrots!
Chomp, chomp.
When the cupcakes were cooled and frosted we stuck in the Toppers.
Ready for the party!
And in case you're wondering what happened to those pretty orange cupcake liners I started with?....
I realized after pouring batter into all the cups that I'd forgotten to add the mil.
GRRRR.
So I squeezed the batter from every cup and had to go with the silver liners instead. No big deal but seriously how cute were those orange ones??
Happy Easter!
Tuesday, March 19, 2013
One year old
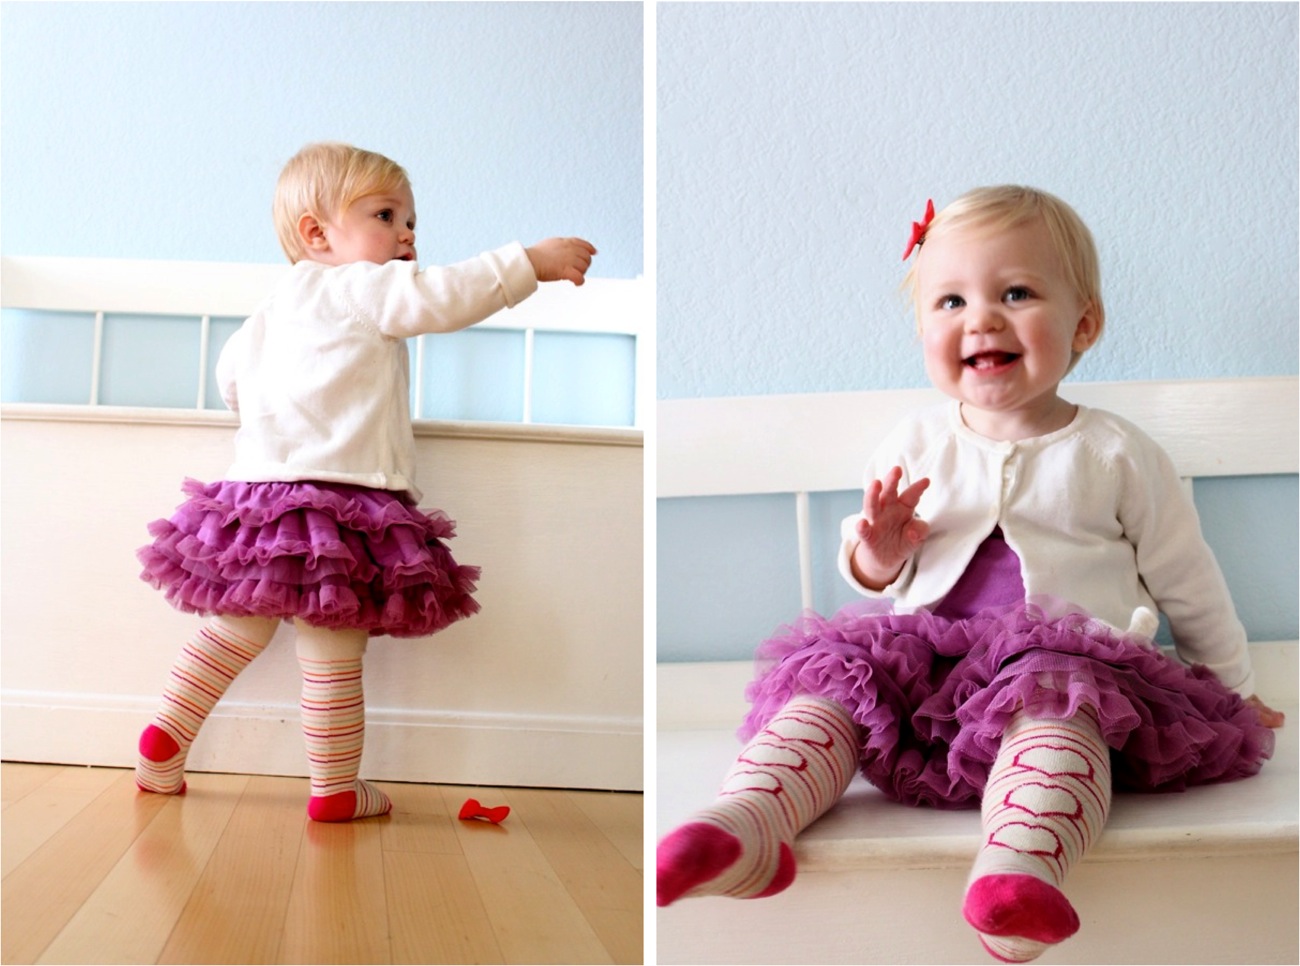
Well in the shuffle of CTB stuff, I forgot to mention that my little baby turned ONE YEAR OLD. Clara is one! And I just can't believe it's been an entire year since we drove off to the hospital and a little squishy ball of baby was born. Life is happening and kids are growing.
Each of my children have been "good babies".
Well, Owen required a bit more attention which is on par with his personality...he's just more extreme in every emotion, in every direction. But that's what I love about him.
And third time around, we got our Clara doll. And she has really been a delightful cheerful little girl. She smiles and smiles and tries to keep up with the big kids. AND, she's started walking! It's been bits of the Frankenstein stumble for the past month but just this week she's preferring to walk over crawli and it's so fun to watch her get around!
Most of all I love Clara's little/big personality.
She's a bit of a goofball like her brother and loves to giggle and play games.
She's come a long way in a year.
Little slug:
Happy adventurer:
Always making cameos on my Instagram (follow me @danamadeit or via Twitter @danawillard)
Clara is a tenderheart for babies and animals and can't keep her hands off of them. If there's a puppy in the park she needs to be in his face. And while Lucy was never a baby doll kind of girl, Clara can't help picking one up and snuggling with it. So for her birthday (on Feb 9th) we gave Clara her very own doll and she scooped that little thing up.
Then we broke out the standard birthday cupcakes and let her go at it.
Timid at first, then went animal style with all mouth, no hands.
Mmmm. Cupcakes.
Here's the 12 month comparison:
Thank you Clara doll for being part of our family!
Sunday, March 10, 2013
TUTORIAL: Muscle Tees
One final project to wrap-up Celebrate the BOY.
It's a simple spin on the Basic TEE I shared 2 weeks ago and works great for Texas summers.
I told him it was a muscle Tee and he said, isn't it a tank top?
Fair point. But doesn't muscle tee sound cooler?
Muscle Tee it is. He thought it was fun to show off his (growing) muscles and actually surprised me by loving this outfit. He asked if he could wear it the rest of the day. You gotta it Mr. Muscles.
The sleeveless Tee is just as easy to make as the Basic Tee. Start by reading the Basic Tee tutorial and download the free size 4T Pattern .
And now it's time for that mysterious dotted line. Ooooo. Cut along the dotted lines of the Front and Back pattern pieces and you have Muscle Tee pattern pieces ready to go!
NOTE: Make sure your write "Muscle Tee" on the new pattern so you aren't confused the next time you go to make a Basic Tee and pick up the wrong pattern.
• With your new pattern pieces, cut a Front and Back from the fabric (as outlined in the Basic Tee)
• Cut ribbing for the neck and armholes, and iron each strip in half (read more about ribbing in the Basic Tee)
Cut 1 Neck piece: 11.5 x 1.75 inches
Cut 2 Armhole pieces: 12 x 1.5 inches
• Sew the neck ribbing as shown in the Basic Tee. Then, rather than adding sleeves we're going to add armhole ribbing.
• With right sides of the folded ribbing and t-shirt armhole together, stretch and pin the ribbing to the armhole. First find the center point of the ribbing and pin that to the center of the armhole. Then pin the ends of the ribbing to the ends of the armhole. Then continue stretching, pinning, and evenly spacing the ribbing along the armhole.
• Sew the ribbing in place using a straight stitch and a 1/4 inch seam allowance. Iron out your seams.
• To add a pocket, cut a small square (or any shape), iron the edges under (sewing the top of the pocket down first as shown in this tutorial), position it on the Tee, pin it in place, and sew it down with a 1/8 inch seam allowance.
• With right sides of the Tee together, pin and sew the sides of the Tee together.
• To keep the armholes snug and from gaping out, do not follow the line of the arm ribbing as it flares out slightly when you sew. Just sew a straight side seam with a 3/8 inches, starting at the top of the ribbing and going straight down (see left photo below)
• When you're finished with your Tee, the side seams at the armholes will be poking into the armhole slightly, which might be uncomfortable to wear. So, sew the side seams down on the ribbing about 1 inch.
And you're done!
Owen thought Muscle shirts gave him Jedi powers.
Is he ready to punch me? Or flex me?
He's probably just happy this is the last photoshoot he has to do for a while.
Yay for boys!
Now head over to Made by Rae to see what she's sharing.
-------------------------------------------------------------------------

This is part of Celebrate the BOY, a series hosted by me and Made by Rae.
Here’s what we’ve done so far:
DAY 1: Dana: 5 Steps to the Basic Tee • Rae: Saffron Pants and Color Roundup
DAY 2: Dana: Pants Roundup • Rae: Little Bit of Color Hoodie
DAY 3: Dana: KID Pants with Back Pockets • Rae: Little Bit of Color Hoodie
DAY 4: Dana: 13 DIY Fabrics • Rae: Show your Stripes Turtleneck
DAY 5: Dana: Favorite T-shirt Buddies • Rae: Stripes Rule Roundup and Celebration Garland
DAY 6: Dana: Big Stick Pjs • Rae: Fox Tee
DAY 7: Dana: Beach Robe to Cozy House Robe • YES to Bold Prints and Tuxedo Stripe Pants
DAY 8: Dana: We be Jammin roundup • Rae: City Pants
DAY 9: Dana: Stripes, Checks, and Piping, oh my • Rae: Mustache roundup and Tic Tac Toe Shirt + Piping how-to
DAY 10: Dana: Chewie Shirt • Rae: Piping improves everything
• Keep adding your own BOY projects to the CTB Flickr Group!
• And check out the Archives for additional projects
It's a simple spin on the Basic TEE I shared 2 weeks ago and works great for Texas summers.
I told him it was a muscle Tee and he said, isn't it a tank top?
Fair point. But doesn't muscle tee sound cooler?
Muscle Tee it is. He thought it was fun to show off his (growing) muscles and actually surprised me by loving this outfit. He asked if he could wear it the rest of the day. You gotta it Mr. Muscles.
The sleeveless Tee is just as easy to make as the Basic Tee. Start by reading the Basic Tee tutorial and download the free size 4T Pattern .
And now it's time for that mysterious dotted line. Ooooo. Cut along the dotted lines of the Front and Back pattern pieces and you have Muscle Tee pattern pieces ready to go!
NOTE: Make sure your write "Muscle Tee" on the new pattern so you aren't confused the next time you go to make a Basic Tee and pick up the wrong pattern.
• With your new pattern pieces, cut a Front and Back from the fabric (as outlined in the Basic Tee)
• Cut ribbing for the neck and armholes, and iron each strip in half (read more about ribbing in the Basic Tee)
Cut 1 Neck piece: 11.5 x 1.75 inches
Cut 2 Armhole pieces: 12 x 1.5 inches
• Sew the neck ribbing as shown in the Basic Tee. Then, rather than adding sleeves we're going to add armhole ribbing.
• With right sides of the folded ribbing and t-shirt armhole together, stretch and pin the ribbing to the armhole. First find the center point of the ribbing and pin that to the center of the armhole. Then pin the ends of the ribbing to the ends of the armhole. Then continue stretching, pinning, and evenly spacing the ribbing along the armhole.
• Sew the ribbing in place using a straight stitch and a 1/4 inch seam allowance. Iron out your seams.
• To add a pocket, cut a small square (or any shape), iron the edges under (sewing the top of the pocket down first as shown in this tutorial), position it on the Tee, pin it in place, and sew it down with a 1/8 inch seam allowance.
• With right sides of the Tee together, pin and sew the sides of the Tee together.
• To keep the armholes snug and from gaping out, do not follow the line of the arm ribbing as it flares out slightly when you sew. Just sew a straight side seam with a 3/8 inches, starting at the top of the ribbing and going straight down (see left photo below)
• When you're finished with your Tee, the side seams at the armholes will be poking into the armhole slightly, which might be uncomfortable to wear. So, sew the side seams down on the ribbing about 1 inch.
And you're done!
Owen thought Muscle shirts gave him Jedi powers.
Is he ready to punch me? Or flex me?
He's probably just happy this is the last photoshoot he has to do for a while.
Yay for boys!
Now head over to Made by Rae to see what she's sharing.
-------------------------------------------------------------------------

This is part of Celebrate the BOY, a series hosted by me and Made by Rae.
Here’s what we’ve done so far:
DAY 1: Dana: 5 Steps to the Basic Tee • Rae: Saffron Pants and Color Roundup
DAY 2: Dana: Pants Roundup • Rae: Little Bit of Color Hoodie
DAY 3: Dana: KID Pants with Back Pockets • Rae: Little Bit of Color Hoodie
DAY 4: Dana: 13 DIY Fabrics • Rae: Show your Stripes Turtleneck
DAY 5: Dana: Favorite T-shirt Buddies • Rae: Stripes Rule Roundup and Celebration Garland
DAY 6: Dana: Big Stick Pjs • Rae: Fox Tee
DAY 7: Dana: Beach Robe to Cozy House Robe • YES to Bold Prints and Tuxedo Stripe Pants
DAY 8: Dana: We be Jammin roundup • Rae: City Pants
DAY 9: Dana: Stripes, Checks, and Piping, oh my • Rae: Mustache roundup and Tic Tac Toe Shirt + Piping how-to
DAY 10: Dana: Chewie Shirt • Rae: Piping improves everything
• Keep adding your own BOY projects to the CTB Flickr Group!
• And check out the Archives for additional projects
Subscribe to:
Posts (Atom)