Welcome to the first part of our KID Shorts series!
If you've never sewn shorts before, it's easier than you think. Shorts are the perfect project for a beginner to tackle. And if you're a seasoned sewer then you know just what we're talking about! In little time (and for little money) you can cut, sew, and whip up a pair of shorts your kids will wear all summer long.
Today we're starting at the basics, with
Basic Shorts.
They have an elastic waistband, come in varying lengths, and might make you do a little jig.
They're that fun...because
basic doesn't have mean boring! With some cute fabric and the right pattern (wink wink), you're set!
So let's get sewing...
This tutorial is part of the companion instructions for our KID Shorts Pattern, which you can purchase HERE. The pattern comes in 11 sizes, from ages 12 months to 10 years old, for boys and girls.
You do not need our pattern to sew these shorts but it's recommended. If you're using a different pattern, or if you've created your own pattern, follow along with the instructions and make shorts with us!
• Prewash and dry your fabric before getting started
• Print the proper pattern pages for your size (use the chart in the pattern to determine which pages).
• Cut and piece the pages together and we're ready to cut fabric.
FABRIC
For this basic pair of shorts I'm using a light-weight cotton fabric, from Joann fabrics. There is no "right" or "wrong" side to my particular fabric because both sides of the fabric look the same. But remember when sewing most fabrics that the "right" side is the good-looking side, the side of the fabric that will be on the outside of your clothing.
• Fold your fabric in half, selvege to selvege (refer to the photo below).
The selvege is the finished edge of the fabric that typically has printed words and markings. The cut edge is where your fabric was cut at the fabric store. And the grainline refers to the direction the fabric threads are woven. That sounds technical. All you need to remember is that typically, it runs parallel to the selvege edge. So when you're laying out your pattern, make sure the grainline marking on the pattern runs parallel to the selvege as well.

Annnnnd of course, there's always room for breaking the rules. So if you're having a "make it work" moment with a small cut of fabric you found in the bottom of your stash...you can also cut the pattern parallel to the Cut edge (just be careful that printed images on the fabric will match up).
OR....you could even cut your fabric on the bias (45 degree angle) to give checkered fabric a diagonal look. But I'm getting ahead of myself here.....
Okay.
• Lay your shorts pattern over the folded fabric, with the grainline marking parallel to the selvege and cut out your pieces. Because the fabric is folded, you end up with two FRONT pieces and two BACK pieces.
Now let's talk about basic shorts (and pants) construction.
There are various ways to sew shorts and various patterns. Some patterns only use 2 pieces, where the front and back of each leg are cut in the same pattern piece. Some patterns even use the same pattern piece for the front and back of the shorts. I prefer separate pieces for the front and back because you get a roomier fit in the back for a kid's bum, and a lower rise in the front for the tummy.
I also prefer 4-piece shorts, where there are 2 Back pieces and 2 Front pieces. This makes it easier to mix -p the pattern down the road and turn them into racer shorts, to add pockets, etc.
But both methods of shorts construction are great and useful and serve different purposes.
The diagram below shows the various parts of your pattern pieces. The pieces shown are the two FRONT pieces. They come together at the crotch seam. And when sew to the BACK pieces, create leg holes! Easy stuff.
Ready to sew?
Let's do it.
1. Sew the Crotch Seams.
With right sides of the fabric together, sew down the crotch area of the two Front pieces and then sew down the crotch area of the two Back pieces.
--Use a 3/8 Inch Seam Allowance for this entire tutorial--
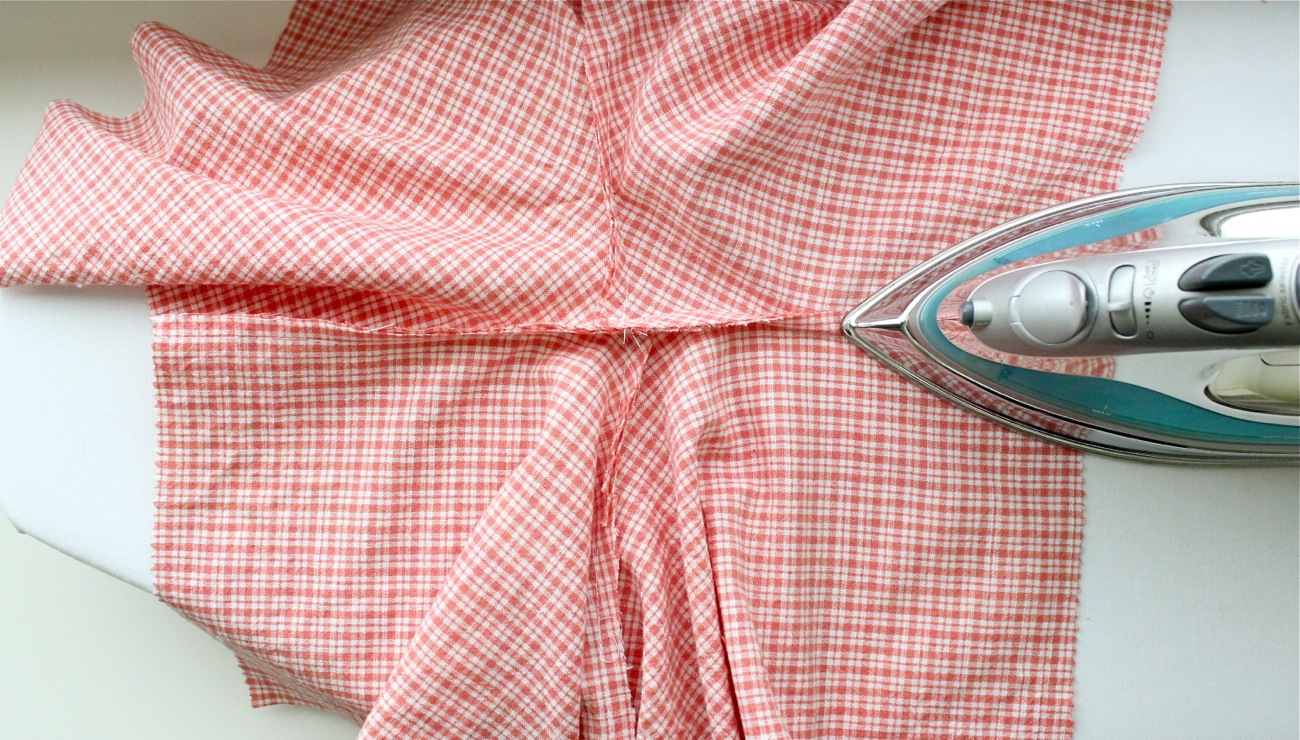
Then iron out your seams.
Ironing is key to make your clothing look professional and less homemade!....so always iron between each step. When you get to the curve of the crotch, pull the fabric with your left hand to get the iron smoothly down the seam.
And your shorts should look like this (BACK and FRONT pieces):
Now before the next step, I recommend marking the bottom of the shorts so you can keep track of which end is the top and which is the bottom. It sounds crazy, but once you sew the crotch closed, it's very easy to forget which side is up and which side is down. I've done it. Multiple times. But only with the boy-length shorts. Girl shorts are easier to differentiate. So, use a pair of Pinking Shears (those zig-zag scissors) to trim the hemline or simply place a sewing pin in the hemline to remind yourself.
Now with right sides of the fabric together, pin the Back and Front of the shorts together at the crotch. First match up the crotch seams and then continue pinning all the way down the inseams.
2. Sew the Inseams
In one line of stitching, sew up the inseam of one leg, around the crotch, and down the other inseam. When you get the middle crotch area, pause, leave you machine needle down in the fabric, and lift your presser foot to pivot the fabric as needed.
Iron out the seam and then fold the shorts back together, with right sides of the fabric together.
3. Sew the Side Seams.
Match up the side seams of the Front and Back. The Back leg pieces are slightly wider, so simply pull the Front edge over till it meets the Back edge. Pin down each side.
If you have a small side tag/label, now is a good time to insert it, about 3-4 inches from the hemline. If you don't have personalized labels you could insert a small piece of folded ribbon (just for a fun look) or make some with twill tape and a stamp.
Sew down each side seam and iron out your seams.
And just like that.....
Okay. Just two more steps.
4. Sew the waistband.
In this tutorial we're sewing a full waistband, with elastic strung thoughout. In the next tutorial we'll sew Flat Front Shorts which only have elastic in the back of the shorts.
So....
Iron the edge of the waistband under a 1/2 inch, then iron it under another 1 1/4 inches. This is wide enough for 1 inch-wide elastic to pull through the casing.
We need to leave an opening in the back of our casing when we sew, so we can string the elastic in and out. So place a pin to mark a "start" point in the casing, then place another pin 1 1/2 inches over to mark a "stop" point. Sew from start point to stop point, about 1/8 of an inch from the folded fabric edge.
Cut a piece of 1 inch-wide elastic the proper length for your shorts size (use the chart in the pattern). Or basically, cut the elastic the length of your waist (or the area where the shorts will hang), plus a 1/2 inch for overlap.
When it comes to purchasing elastic, I prefer Knit Elastic because it doesn't curl up inside the waistband the way Braid elastic can sometimes do. If you've had this happen you know what I mean. You can find Knit elastic in most fabric shops. Or if you think you'll be sewing tons of shorts (I am!) look on ebay for great deals on 1 inch wide knit elastic. I purchased 50 yards for only $15!
Okay, with our waistband casing sewn we're going string elastic through. Place a safety pin on the end of the elastic, stick it through the casing opening and push the elastic through the casing till it comes out the other side. Overlap the two ends of the elastic by a 1/2 inch (make sure the elastic is not twisted inside of the casing!)
Sew the elastic ends together with a zigzag stitch.
Then sew the casing opening closed by pulling the fabric slightly to make it taut as you sew.
Final step!
5. Sew the Hemlines.
This shorts pattern was designed with enough length to give you wiggle room on the hem (so you can make the hem as chunky or as narrow as you like). The best method is to try the shorts on your child and mark exactly where you'd like the hem to hit (I prefer right at, or barely above the knee for boys). Or just go with our recommended lengths here.
Iron the hemline edge of the shorts under a 1/2 inch on each leg. Then iron it under another 1 inch on each leg.
Sew the hemlines in place, about 1/8 inch from the edge of the folded hemline.
Sew a personalized label to the back of the waistband (read more about my labels
here). This is purely optional, but the label helps my son remember which is the front of the shorts and which is the back when he's getting dressed.
And....
Drumroll.....
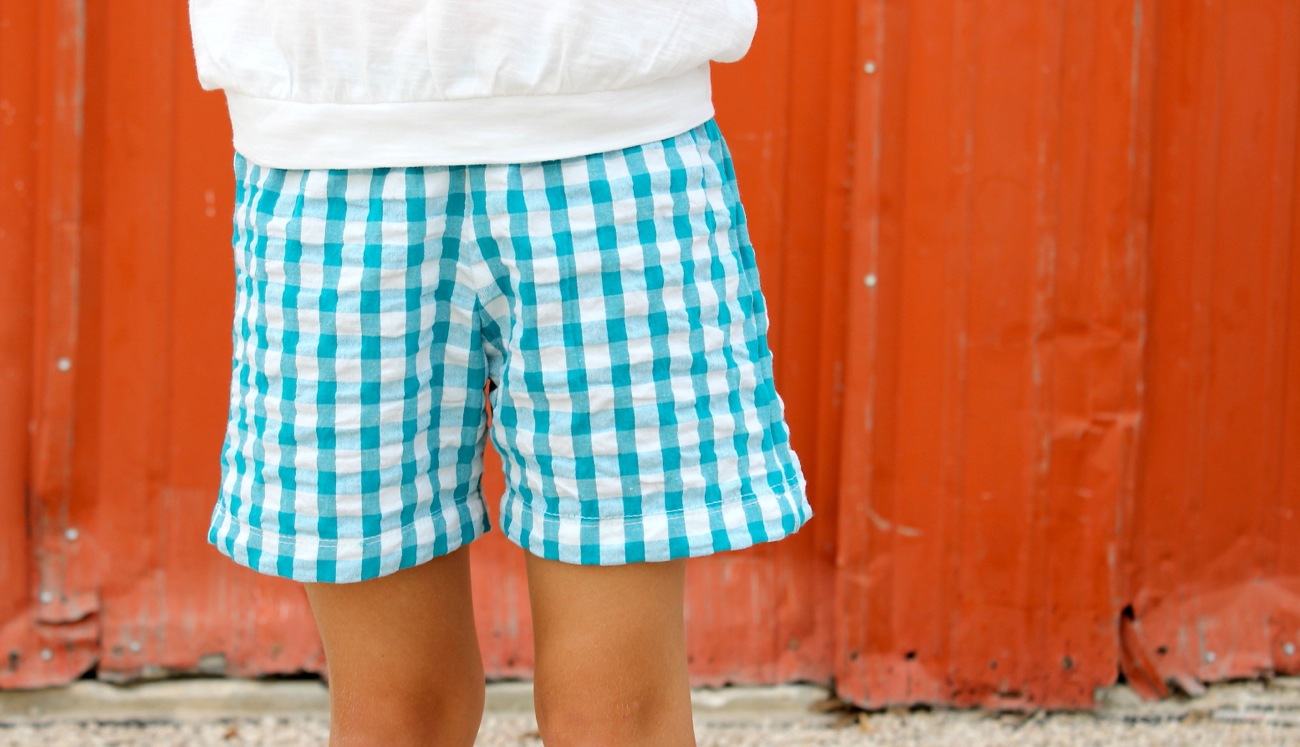
You're done!
Can you believe it? You just sewed shorts!
And they're pretty stinking cute.
Enjoy your summer afternoon!
And come back tomorrow for our next KID Shorts tutorial.
The KID Shorts pattern can be purchased HERE.