Friday, December 21, 2012

hearts for Newtown and other ways to give


Are you looking for ways to give back to the Newtown, CT community?  I'm amazed at how quickly giving hands can assemble.  
Here are a few ideas floating around online:

• Make Snowflakes! Many of you are already do this.  Hooray!  If you haven't heard yet, the National PTA is going to create a Winterwonderland for the students of Sandy Hook Elementary when they return in January to their new school (more info HERE).
How fun, easy, and beautiful is that?  Snowflakes need to be sent by 1/12 to the following address:
Connecticut PTSA
60 Connolly Parkway
Building 12, Suite 103
Hamden, CT 06514

• Make blankets.  A fellow blogger Michelle lost her brother years ago and neighbors reached out to her family by making each of her siblings a blanket to cuddle with and feel comfort.  She still cherishes that blanket and would like to do something similar for Newtown.  These blankets will not only be given to children at the school, but families throughout Newtown, CT.   Quilts need to be flannel on both sides, 45 x 60 with 11 ounce batting and tied with yarn. They need to be done by January 10th.
For all the info click HERE.

• Operation Sandy Hook.  The Small Fry Blog has teamed up with Brickyard Buffalo and several other artists and graphic designers to do a capsule collection of downloadable prints, all at $5 each. The profits will go to the Sandy Hook School Support Fund through United Way.  Read more about it HERE.
Give monetary donations directly to the Sandy Hook School Support Fund.  This is done through United Way and will help pay for support systems, counseling, etc for the whole community. Read more about it HERE.

• Make Hearts of Love.  This is what we've chosen at our house and would love you to join us!


The hearts aren't meant to replace the PTA snowflake project but to work along with it, since I'm sure they'll have more snowflakes than they can hang.  And when I think of giving, the image of hearts and love keeping coming to mind.  So let's fill their rooms with hearts too!


The kids and I spent 20 minutes this morning cutting hearts from colorful paper.  As we cut I very simply explained that we were sending hearts to a family who lost their little girl.
Lucy and Owen thought hearts were a good idea.  Owen even said, "maybe they can hang them in her room so she feels loved."  It's beautiful watching their minds work.

If you're feeling extra crafty, you could sew a few together so they can hang from the ceiling, or just send them as they are.  
Hearts need to be sent by 1/12 to the following address:
Connecticut PTSA
60 Connolly Parkway
Building 12, Suite 103
Hamden, CT 06514

 If you know of any other projects and ways to give please leave info in the comments and I can add it to the list.
Have a wonderful weekend!


Thursday, December 20, 2012

trying to make sense of the world....and squeezing tight

When tragedy happens it takes a few days to sink in, for me. It was the same with 9-11. I was horrified and glued to the TV and couldn't believe what was happening.

But it wasn't until days later when the media started sharing backstories about the individuals....what they were doing that morning, the train they missed or hadn't missed that put them in the Towers at the moment of impact, the camping trip they'd just taken with their kids...all those human details that had me crying in the car at a stoplight or in a bathroom stall, thinking about the unthinkable. 
The Newtown, CT shooting stirred inside of me all weekend.  Like many of you moms with young children, the story is just too close to home.  I wanted to sit in front of the TV and let the news pour in and feel connected to the situation, as I had with 9-11.  But with my kids in the house I chose to keep a distance and avoid the ugly reality, till nighttime when they had gone to bed.  And I thought I was handling the news of it all fairly well.   But then I dropped Lucy off to school on Monday morning and it really sunk in.
 At Lucy's school the kids start the day by saying the Pledge of Allegiance, then the Texas Pledge of Allegiance (which is sooo Texas and makes me smile), and then there's a short moment of silence.  I'm usually in the hall and back out to my car by this point.  But on Monday we were running late so I stood next to Lucy at her desk, hand over my heart.  After the pledge, the Star Spangled Banner was played from the loudspeaker.  And then they had a moment of silence and announced that we would pause a while longer to remember of the families and children of Newtown, CT.

I looked around the room at these 20 children, 1st graders, some standing quietly, some wiggling their legs and daydreaming of recess.  All of them so innocent and looking forward to the Christmas holiday.  And I just teared up.  I couldn't hold it in. Another mom was there, hugging her son and probably thinking the same things.   I couldn't imagine looking up at the classroom door to a crazy person with weapons in-hand.  What a horrible, pointless act.  My heart aches for those families who lost their own little Lucy and Owen and came home that afternoon to empty beds and unopened Christmas gifts.  What horrible loss.
I know this conversation has been hashed and rehashed all week.
There are many conversations out there about gun violence, gun rights, home schooling vs. public schools, protecting our kids, teaching our kids about reality.  They're all natural thoughts.  We want answers.  We need answers to something so senseless and heartbreaking.  It's how our human minds work.
But I'm not sure there is an answer.
And all I can think is to continue being the best parents we can be and to teach our children strong values, to make good choices, and to be leaders for good. 
I've never lost a child and can't pretend to know what that's like.  My heart, hugs, and prayers reach through the screen to those of you who have experienced it.  And my hugs to anyone who feels a little down and needs some hope back in their day.
Today I'm thankful that my children are still young enough that I didn't have explain to the ugliness that lives in this world along with the beauty.  Some day I'll have to go there. 
But right now I'll hug my little Star Wars fanatic and my tall skinny Lucy girl and my edible squishy baby and be thankful that despite the hard the days, they still call me Mom.  And I hope that never changes.

Wednesday, December 19, 2012

Sewing for Corduroy: new tote and quilt

Yesterday I finished a Christmas gift for Lucy's school teacher, based on that cute cuddly bear Corduroy.
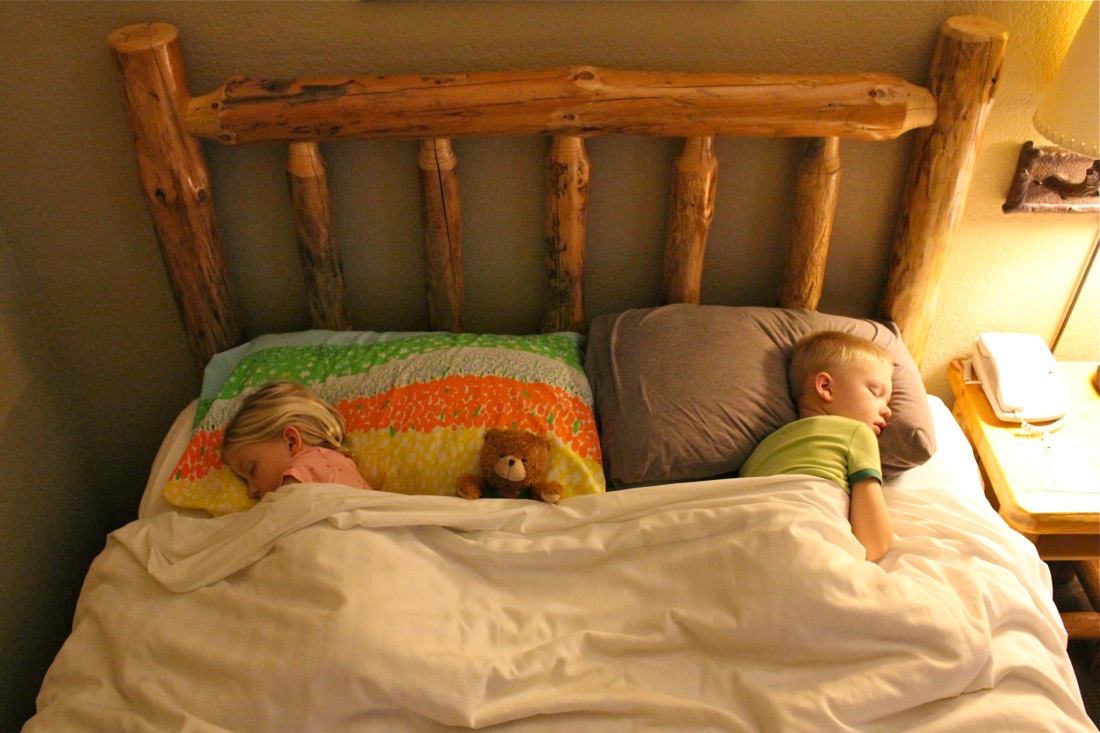
Each child in Lucy's class is allowed to bring Corduroy home for a special weekend where they can show him around their house and everyday routine.  Lucy read books to him, we took him to the Great Wolf Lodge, he jumped in and out of Clara's carseat, got tons of hugs....stuff like that.
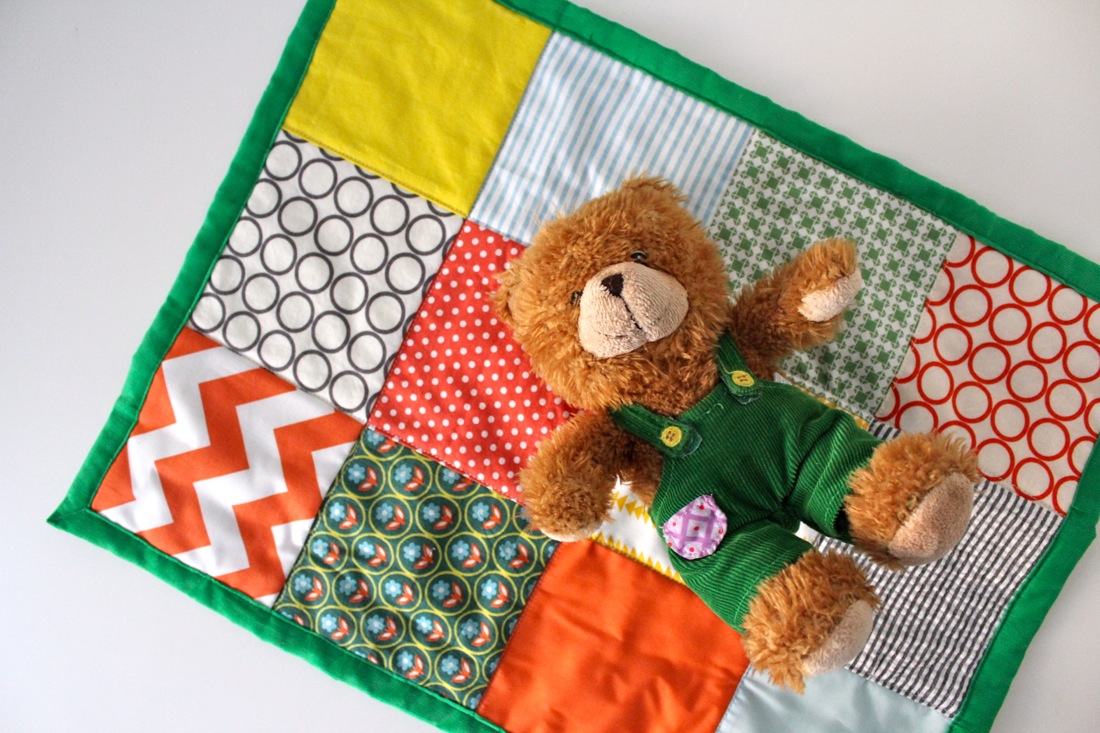
But when it was time for bed, Lucy quickly realized that needed his own special bed.  And he definitely needed a corduroy quilt.    
So I flipped through the books that came home with him for inspiration.
In A Pocket for Corduroy, the little girl visits the laundromat and asks Corduroy to sit on the chair while she and her mom fold clothes.  He sits quietly and watches....until he becomes curious...and then becomes stuck in the laundry cart where he's left to sleep all night long. Poor Corduroy
Thankfully the girl comes back to find him the next day.  The story is sweet and I loved all those bright colors.  So I sewed a very simple quilt with....green corduroy on the back!  It was fun to explain to Lucy why Corduroy is called Corduroy.  She couldnt wait to report the fabric news back to her class.
Ah. Much cozier.
We decided to send the quilt back with Corduroy for the next child to enjoy.

But then we noticed one other problem....the bag he came in was torn on two sides and totally falling apart.  And since you know how much I love making tote bags, I just had to do this.

A Corduroy Bag!  Inspired by his happy green overalls.
And complete with straps on the back.  When I showed Lucy the bag, she studied it for a second and then smiled wide..."I get it!  It's like Corduroy's overalls!  Cool!"
It reminded me of last year, when I sewed School bags for Lucy's Kindergarten teacher (click on a pic below for more info):

I used the Reversible Tote Tutorial as my base:
But for some reason it was a beast figuring out the sizing on the overalls and straps.  I had to redo the back piece a couple of times.  Which means...you're in luck!  I've done all the messy work so you can easily make one.  Here's what you do...

• Read over the Reversible Tote Bag Tutorial if you're aren't familiar with the sewing steps.
• Cut out your bag pieces from two colors of fabric. I used cream colored Duck Cloth (heavy canvas) and green colored denim.  You can definitely use real corduroy fabric but I couldn't find a green shade I liked, so I went with denim.  Good heavy-weight fabric for a lot of kid-use.
Okay.  Refer to the image below as you cut.

PIECES TO CUT
FRONT: 18 X 15 inches (green),  18 x 4.5 inches (cream)
BACK: 18 x 11 inches (green), 18 x 8.5 inches (cream)
LINING: 18 X 18.5 inches (cream, cut TWO)
Front Straps: 2.5 x 36 inches (cut one green, one cream)
Back Straps: 2.5 x 52 inches (cut one green, one cream)
Buttons: Cut 4 circles from gold felt, wide enough to fit over the straps

• Start by sewing the Lining pieces as outlined in the tutorial (sew down the sides and box out the bottom).  Set the lining aside till the very end.
• Next assemble the straps.  Sew the back strap as outlined in the tutorial.   For the Front Strap, we're going to close off the ends.  So....
• Start sewing the Front Strap about a 1/2 inch from the end of the strap (this will help to tuck the ends inside later).  Stop sewing about a 1/2 inch from the other end of the strap as well.
• Continue assembling the strap as you did with the back strap.
• Finally, tuck each end of the strap under, pin it in place and sew off the end (using a topstitch)
• Set the front strap aside.
• And sew the back strap to the back of the bag.
NOTE: after all was said and done I would have done this step a little differently.  So.  I'll show you what I did, and what I should have done.
• Starting with the cream-colored back piece, lay your back strap so that the handles are about 4 inches from the sides of the bag and so it criss-crosses on the back.
• Sew it to the back of the bag, sewing right over the topstitching that's already on the straps.
• Start and stop sewing the straps about 3/4 inch from the top of the bag (so you can tuck it under later on). 
• With right sides of the fabric together, sew the green piece of the Back to the cream piece.  And now the back of the bag is ready to go!
NOW...what I should have done.....was to sew the "X" and the handle separately, so the handle stand more vertically and lay more flat. 
Ideally, you should sew a criss-cross on the back, snip the ends at the top of the bag (so that the handle is disconnected), and then tuck/sew a separate handle into the bag as shown in the tutorial.  I was sort of able to do this in a later step and had a good "make it work" moment so it's all good.

Now it's time to sew the front handle to the front of the bag. 
• First sew the cream and green pieces of the front together.  Then lay the front over the back just to gauge where the handles should go and make sure they line up properly.
• Pin the handle in place, so that the ends hang over the green fabric an inch or two (like the front straps of overalls)  And sew it down, sewing over the topstitching that already exists on the handle.
• Start and stop sewing the handle about 3/4 inch from the top of the bag.
• Make and attach the buttons.  My first plan was to use real buttons but I could never find them the right size and shade that I liked.  So I used felt!
• Cut 4 circles of felt (trace a cup, etc)
• Sew two circles together about 1/4 inch from the fabric edge.  The easiest way to sew circles is to go slow, sew a few stitches, lift the presser foot and pivot the fabric slightly, and do it again.
• Mark 4 button holes on the finished buttons, using a fabric marker (this marks where you're going to sew an X across the buttons)

• Using embroidery or crochet thread and a needle, hand-sew each button to the handle ends (like a button on overalls).  Starting on the back of the fabric, come up through the first marked dot, sew across to another marked dot, and continue till you've created an X across the button.  Do this two times for each button.  And you're ready to sew the back together!
• Following the tutorial, sew the bag together at the sides...
...box out the bottom of the bag, iron the top hems under, place the lining bag inside the outer back and pin them together like crazy.

And here's where I sort of corrected my little handle problem from above.  I was able to stuff a 1/2 inch of the handle down in between the bag and lining before sewing the top closed.  This made the handle lay much nicer.  But it was also pretty bulky to sew over that area.  So go slowly.
And.....(Corduroy's checking in on your progress).....
You're done! 
Enjoy your new home Corduroy!  And be more careful next time you're at the laundromat.
It's easy to see how you could be mistaken for clothes.
...or customers.

Monday, December 17, 2012

Living in Texas: Weekend at the Lodge

That sounds kinda fancy.  Wish I had pics of some hoitie toitie Ski Lodge in Aspen.
But think more along the family-fun Disney-esque lines....
It's the Great Wolf Lodge!
Have you stayed there?
We gave it a whirl over the Thanksgiving and overall it was a success.   It took forever to drive from Austin to Dallas but the kids were such patient troopers in the car.  And when we walked into the lodge and they saw all this....pure giddiness.  Wow!  They were full of gasps....while Casey and I chuckled over the silly music playing on loop in the parking lot, "welcome to the lodge, welcome to the lodge" (or something slightly more clever).
 Cool acorn/leaf carpet? Check.
 Beautiful big lodge with a huge fireplace and Tree?  Check.
 Little staged canoes and cozy lodge-y decor?  Check, check.
But the real draw to the Great Wolf Lodge is that it's a hotel with an indoor waterpark!  Yipee!  They heat the water area to 84 degrees so it's warm and balmy in there even on a cold winter day.
There are different areas for all age ranges.  And they have some really cool TALL waterslides for the adults.  Next time we visit, we should go with friends and take turns watching kids so Casey and I can go on the big slides together.  Serious speed.
Lucy's school teacher sent her home with Corduroy for the weekend.  So he joined the fun as well, from a dry spot.
 We brought along some snacks.  And of course, enjoyed the snackbar.
 And every 15 minutes it was fun to watch the big bucket drop on victims below.
 Lucy and Owen could play on about 1/2 of the areas and actually loved the medium-size slides (once we convinced them to give it a try).  And Clara surprised me too.  She was so easy! Just crawled from here to there, exploring.  I loved seeing her diaper bum in a suit again.
And of course there's always the excitement of sleeping a hotel room.
Mama bear and cubs.
 The hotel had kid's activity areas and overpriced drinks.
And a life-size gingerbread house!  Seriously, this thing was so cool!  I'm not sure the icing was edible but everything else on it was. 
What kid wouldn't want to live here?


The other highlight of the Lodge was playing the MagiQuest wizard game.  You purchase these magic wands and wander the hotel in search of special clues, treasures, etc.  And all the other kids are doing it too.  It's the perfect night-time entertainment. 
I'll be honest, it wasn't the kind of vacation Casey and I would choose.  But the kids were happy so we were happy...and we topped off the trip with some In-N-Out, the Czech Stop, and an hour at the Lego store.  Thanks for a fun weekend Dallas!