Wednesday, January 30, 2013

TUTORIAL: Winter Button Scarf

I don't wear scarves very often.  In fact, I rarely get the chance to wear my fun orange coat!  Cause Texas is more about the warm months than the cold ones.
But since I was headed to Utah last week, I jumped at the chance to give the Summer Scarf a winter twist.
I used warm cozy fabrics, bundled it around my neck a few times, and added a chunky button. Done!

Here's what you do....

FABRIC:
• You need about a 1/2 yard of 1 or 2 fabrics.  If you have a serger, you can make a single layered scarf.  If you don't have a serger we'll make a double-layered cozy one.
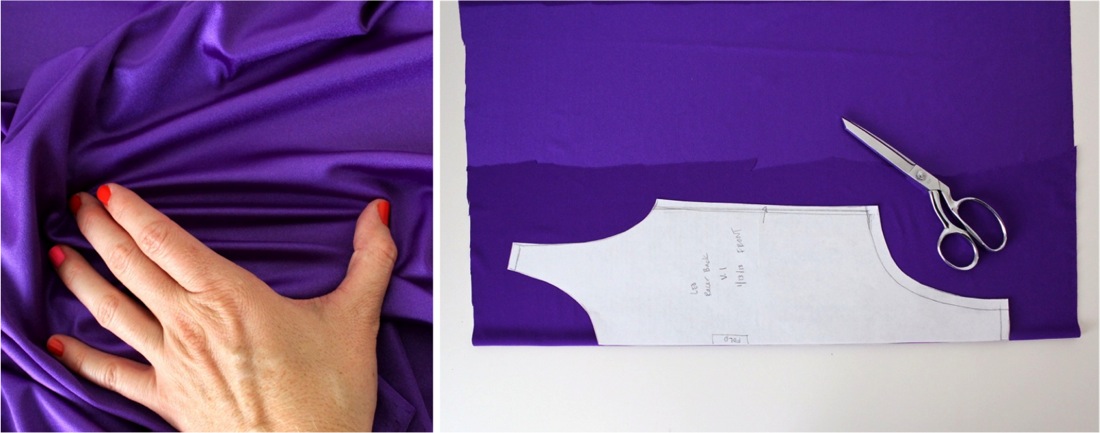
Types of Fabric: soft cottons, flannel, knits, light-weight and non-scratchy wools
For this polka dot scarf I used quilting cotton on top (from Joanns) and cream colored flannel on the bottom.
• Cut 2 rectangle strips from each fabric, 42x5 inches each (or whatever size you'd like; these are the dimensions I used)
• Sew the two dot strips together, then sew the two flannel strips together.
• With right sides of the fabric together, pin the two strips together and trim the edges so they're curved (optional; it just looks cute).
• Leave an opening in the scarf so you can turn it right-side out when you're done sewing (similar to making a pillow).  Mark this opening with pins so you have a Start and Stop point for sewing.
• Staring at the Start point, sew the two fabrics together all the way down, around the curves and back up to the Stop point.
• Clip the curved ends in the seam so the curves will lay flat when turned right-side out.
• Turn the scarf right-side out.  The best way to do this is to stick your arm in the opening and pull each end out.
Now as much as you want to....resist the urge to iron the seams flat.  I know. It's hard!  I'm always encouraging you to press.   But if you leave it as-is, the scarf will ruffle a bit nicer.
• Pin the opening closed and sew it closed.
Time to ruffle!

We're going to use Elastic Thread.....and if you've never used it, it's going to change your life.
Really.
It will.
I use it for so many projects.
And it's SO easy!

It comes in small spools, sold in most fabric shops and on Amazon for about $2/each. I've only seen it in black and white but those seem to work for my needs.
To sew with elastic thread, you place Standard thread in the top of your machine and thread it just as you normally would, then you place Elastic thread in the bobbin.

To get elastic thread in the bobbin you need to wind it by hand.  Don't tug or pull the elastic too tight as you go.  Just casually wind (pretty scientific, right?)
Then place the bobbin in the case, load it in, and pull it through.

NOW.  Elastic thread is not perfect and reacts differently in different machines.  I use a Bernina and haven't had problems.  But some readers have mentioned that top-loader bobbins and some Brother machines need to have tension adjustments for Elastic thread to work (do a Google search on "Elastic Thread and Brother machine", etc if you're having  probs).
The key is to be patient and remember that most of the ruffling happens afterward when you spray the fabric with water and press it with heat.
Also, light weight fabrics ruffle up better than heavier ones.
So there are many factors at play.

Okay, with elastic thread in your bobbin let's start sewing.
• Sew a straight line right down the middle (just eyeball it; doesn't need to be exact)
Then sew another line about 1/4 inch over to the right and a line a 1/4 inch over to the left, so you have three lines of elastic.
Your scarf might not be as ruffled as you hoped. Don't worry!
• Spray it with a bit of water and press down the middle with an iron.  Try your best to NOT press the outside of the scarf.  I know that's hard.  But if you can do it, the scarf will be a bit more "bouncy" and less stiff.
And, you're done!

If you have a serger, you might try this single layer method:
It can be difficult going around the curves.  Just go slow and fold, sew, fold, sew, etc.
One more cozy ruffled scarf.
Now let's add buttons.
Try on your scarf to determine the placement of your button....(and try not to twist it at the neck like I did here. Doh).   One side should be longer than the other and decide if you want to wrap it around once or twice.
Use pins to mark where the buttonhole and button should go, then sew them on!  For detailed info on sewing buttons and buttonholes click HERE.
And....there you go.
Ruffled Winter Button Scarves. 
That's a mouthful.

Bundle it up or down and I'm ready for the chill.  Hope your day is a sunny one!

Thursday, January 17, 2013

Stitch Savvy

Fun mail day this week!
I got a copy of the new Stitch Savvy book by Deborah Moebes of Whipstitch.
Then I plopped down on the couch and absorbed the pretty pages.  Isn't that best way to look at sewing books?  Like a box of dark chocolates you just can't put down?

Stitch Savvy is the follow-up book to Deborah's first book Stitch by Stitch--which teaches you to sew from a very beginner level.  This new book is geared toward beginners and intermediate sewers and has a good variety of simple and complex projects.  And I love how it's laid out.
And I love the book's concept: projects and skills that build on one another so you're ready for the next, more challenging project.  

The book has five categories: Home Decor, Patchwork & Quilting, Bags, Sewing for children, and Clothing.  Then within each section are 5 projects with a skill-level of 1-5.  So if you're a beginner and you feel intimidated by making a woman's jacket, just start with all the #1 projects in the book and then move on to all the #2 level projects.
Great idea!
Deborah reviews all the basics first.  She even has a few quick refresher projects for you to try out (and plenty of clever writing to go along. I love her writing style).
Then she jumps right into the projects.

I'm sure we've all wanted to make an ottoman cover at some point?
YES!
A pair of woman's pants WITH a zipper in front and fitted in the back?
Very impressive.
I love this cool Wherever Jacket (and love the model too.  Can I have her hair?)
There are cute kid clothes,
Cute home decor and pretty pictures.  Whenever I flip through a sewing book I mostly love looking at the photos and how it was all designed.
But one thing I really love is that Deborah doesn't leave out any details.  She has great tips along the way and even has a section at the end of the projects called "Try This Too" where she shows variations and other ideas on the project.  Such a neat feature!

 And there's a CD in the back with all the printable pattern pieces for 13 of the 25 projects. 
Ah. My Deborah Moebes collection is now complete (for the moment....I'm sure there'll be more in the future)
Would you like to try out Stitch Savvy?
Today we're giving away one copy!
GIVEAWAY RULES:
• Leave a comment, that’s it.
• Only one entry per person.
• Open to US and Canadian readers
• ONE winner will be picked via random.org
• Giveaway ends, Friday 1/18/13 at 11pm (Central Time).
Winners will be announced next week.

Wednesday, January 16, 2013

Sewing with spandex for the little gymnast

Lucy has been begging me for months to make her a gymnastics leotard.
Well, actually, she's been begging me to buy one of the cool sparkly and velvet ones they sell at her gym.  But for $40 I just can't do it.  Especially when I know I can make one.

So this weekend I finally got started with bright purple Lycra and deep pink Elastic.  Ghastly right?  Perfect.
Now this is sort of a work in progress.  In fact, I hope to share a full tutorial with you down the road with a cooler fabric but I'm still working out the kinks. 

If you're new to sewing with knits, elastic, sewing swimsuits, etc. here are a few tutorials to get you started:


I started by tracing one of Lucy's recent swimsuits to get a perfect fit.  I first made two rough pattern pieces.  Then after sewing the entire leotard went back and retraced, making adjustments where needed. I always label each pattern piece with a "version" number and the date to keep everything orderly.
Then I cut out the pieces from Spandex/Lycra fabric.
• You can purchase spandex in some fabric stores.  My favorite sources are the online shop Spandex World and the in-store shop Michael Levine (when I'm in LA)
• You can read details about the fabric in my book Fabrics A to Z.
• But in a nutshell....Spandex is a very stretchy knit fabric (sometimes sold under the trade name Lycra) that works perfectly for swimsuits and leotards.
• It's important to determine the direction of the stretch before cutting.  Some spandex has 4-way stretch which means it stretches vertically and horizontally, some only has 2 way stretch (like the purple fabric below).  Use your hands to stretch it both horizontally and vertically.  You want the stretch to go horizontally across the body so it can stretch with your tummy. 
Now comes the part where I admit something I should have done 10 years ago....
I used FOLD OVER ELASTIC! (or F.O.E.)   What?!  Where have I been...or not been?  Why has taken me so long?
It's changing my life.
You see, I've made swimsuits in the past (here and here) where I created a casing for the elastic and strung it through.  But unless you have a fancy Coverstitch machine (I don't personally know anyone that does) it's very difficult to get the elastic perfect.  Enter Fold Over Elastic.  It has a small line down the middle where it folds.  So first you sew it to the wrong side of the fabric, then fold it over the fabric edge and sew it to the right side of the fabric.  And....
Tada! 
New leotard! 
And FOE comes in tons of colors, even some prints.  Just doing an etsy search I came up with a bazillion options.  If you have a favorite shop for FOE leave it in the comments! 

Now since I was making things up as I went along I totally forgot to add extra padding in the crotch area and when Lucy tried it on, well....it definitely needed it.  So I patched it up by cutting and sewing an extra piece down there.  Next time I'll sew it in before adding elastic.

AND...I'll create a more detailed tutorial so you can see all the sewing steps.
My little gymnast was quite pleased with the results.  She even pointed out "Mom, I love these little triangles you sewed all over the pink elastic!"  That would be a zigzag stitch and I love that she appreciates the tiny details.

So with Version 1 Leotard finished, we tried it on and she showed me some moves....
(sort of).  You can tell I know nothing about gymnastics...other than watching them during the Olympics.
And, the leotard totally works for baton twirling as well!
Lucy was intrigued. 
 And gave it a whirl.
Then yesterday we really tried out the new routine at her Gymnastics class.
Her friends were excited to see her wearing something other than her old ballet leotard.
 There she goes.
And that's a Leo wrap.
For round 1, I'd say it's a success.  More versions to come....