Wednesday, March 28, 2012

Celebrate BABY---the knitted chevron blanket

Remember that knitted blanket I started forever ago?
2 weeks before Clara was born, I finished it!
...and fell in love with knitting all over again.
The funny thing is, I could have knitted the whole thing in couple weeks (rather than 4 months). It's a pretty small blanket. But a knitting project feels like a good book. You love it so much you don't want it to end.....so you knit real fast and then procrastinate the last 10 rows.
Are you that way too?

It's good that I took my sweet time with it though because it made me more excited for this little girl to come.
Plus, what else can you do at night when you're 9 months pregnant? Sit on the couch and keep your needles clanking.

The quick background....
I used the Chevron Baby Blanket pattern from the purl bee, where everything she does is lovely. I want to live inside her blog.
And I love the yarn colors she chose. But I went with girly pinks and purples instead.
and I got busy. and busy.
The blanket went with me on the plane a couple times, to the park, the doctor's office, and yes the couch. I got real good at counting stitches and unraveling messed up rows. It's not that the pattern is hard. It's actually quite easy (and I'm a total novice---this was my 2nd knitting project). But it's the kind of project that you can not do while talking. It requires you to count every 10 stitches. So it's best to knit with a movie on in the background.

And if you're a fast knitter you could easily have it done a week tops.
Then grab your camera and admire the two sweet things you made....
Yay for blankets and babies with similar gestation periods!
And a huge thank you to my friend Katherine for helping me read the pattern and get started. She's my go-to knitting expert. And when she's not sure about something, we call her mom. It's good to have a support system.

Tuesday, March 27, 2012

houses or hunks?

Just went to the doctor for my 6 week postpartum checkup.
All is well and normal.
But I just have to laugh everytime I'm at her office and see these photos on the ceiling:
I sort of get it when you're at the dentist and would like something to stare at for 30 minutes, while laying on your back listening to the hygienist ask questions you can't answer. Especially when I was kid...I loved looking at puppy dogs and pictures of Big Bird.
Now?
Hunks and kitty cats.
Eh.
Don't get me wrong, I enjoy a little George Clooney or Brad Pitt eye candy (why else have I seen A River Runs Through It 10 times?)
But seriously.
I was thinking.
In an office where most of the clientelle are 20-40 year old women, what would we really want to stare at for a while?
What would easily distract from the task at hand?
It was simple!

this, this, and this:
or maybe this, this, and this....
Home decor, design ideas, creative inspiration, anything from a pinterest HOME board. Torn out pics from Elle Decor, Real Simple, Country Living?

Better yet. How about taping the Target ad up there?!
....since that's exactly where I went after the appointment....and could NOT say no to these gorgeous serving trays:
I usually don't buy dishes full price since I know they'll be on Clearance a month later.
But I have a feeling these will go fast.
Love, love, love.
In fact, I had the hardest time NOT buying the entire set of plates and cups that go along, and the entire set of turquoise ombre dishes as well. They are SO yummy.
See I'm already distracted.
What were we talking about?
Oh yea.
I had a baby 6 weeks ago.

Monday, March 26, 2012

Celebrate BABY - little hat: finding the stretch

I found this awesome hot pink/white striped knit fabric at the FIDM scholarship store last year. It's super stretchy, medium weight (heavier than your standard T-shirt jersey knit), and has a slightly brushed nap on the surface. It is so soft.
And I knew it would be perfect for a baby blanket one day.
So we've been using it for Clara to swaddle and get cozy. And I didn't even do anything to it....just left the edges raw and threw it in the wash.
Done.
I did however, cut off a small strip to make a little baby hat.
You know I love stripes!
But a funny thing happened.
Like most striped knits, I assumed the fabric would stretch horizontally. So I made a hat (using an old newborn hat as my guide. Sorry no pattern to share with you....right now at least. You might---shhh---maybe see something in the next book though?....just sayin').
Well, the finished hat had no stretch around the brim.
Grrrr.
The stretch was on the vertical stripe.
Who does that?
And who sews an entire hat without noticing that?
Uh, me apparently.
So I recut and sewed it with the stripes going down, using a zigzag stitch along the brim to allow stretch in my stitch.
And I actually kind of love it even more.
And, it totally reminds me of this:
Mmmm. It's 75 degrees here today in TX. What I wouldn't give for a yummy one of those.

So now we've got 2 hats. One that fits Clara, one that fits a doll.
And one baby who only wants to cry when I take pics of the hat. I promise she loves it!
Happy Monday.

Tuesday, March 20, 2012

Celebrate Baby---Spring Dye Bath (the good and the bad)

I'm pretty simple when it comes to newborn clothes and stick with onesies, gowns, and leggings for the first couple months. All things that are comfy.
So dyeing bodysuits is a good way to throw style in the mix.
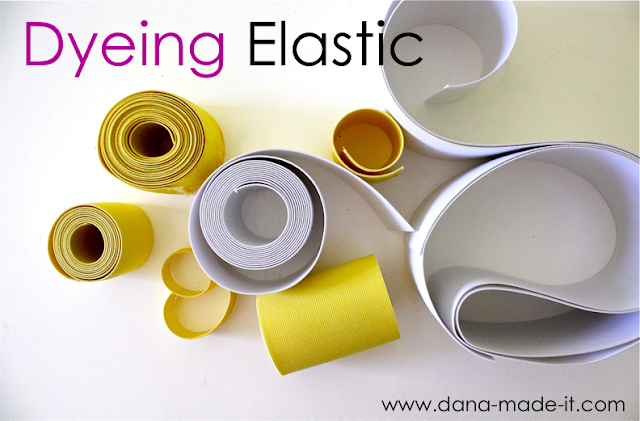
I've shared a couple tutorials before about dyeing fabric and dyeing elastic. And last fall I dyed a slew of onesies for baby shower gifts. This time around I went with bright colors for Clara.
Yipee! Lemon yellow!
Of course when Clara wore it to church on Sunday (with a little skirt) two old men asked how old my baby boy was. Eh. People often asked if baby Lucy was a boy or girl, and she was wearing pink with butterflies. Fashion over...gender?
Sure, why not.

So, here's what I did....and shouldn't have done.
I followed the same steps used in the tutorial above.

Mixing, dunking, stirring, rinsing, washing, drying, etc.
And ended up with some beautiful shades.
But it's always experimental. Not everything turns out as I hoped, some fabrics are splotchy, sometimes I make dumb mistakes. The adventure is always fun though.

These two turned out great.
(RIT liquid dye in colors Lemon Yellow and Purple):
These two turned out the worst.
They were both dunked in RIT Liquid dye, Aquamarine. The right fabric went in first and I have a feeling the dye wasn't mixed very well into the water. There are huge color splotches all over the neck and cuffs. The left fabric went in second and was left in for a very short period of time and looked beautiful (see above photo of wet fabric). But....then I washed it with the purple onesie above.
Um, dumb.
The color totally changed.
Lesson learned.

These two turned out okay.
They have some slight splotching here and there, due to the onesies themselves. These were both old worn-out bodysuits and had slight pilling on the surface and a few milk stains. So the dye gravitated to those areas, resulting in splotches.

But it's nothing a cute baby can't fix.
She'll still get use out of them.
So in summary....

Tips for successful dyeing:
• Make sure the dye is mixed well with the water (just like making jello)
• Use a large bowl so the fabric can swim freely. In the photos above I used small plastic containers since I was only dyeing one item per color. But the containers were too small. The fabric was too bunched up inside.
• Use the hottest water from your sink. A large bowl is helpful with this too since a large quantity of water will stay warm for longer (rather than the small containers I used above).
• Make sure your fabric is thoroughly wet and saturated with normal water before dunking it in the dye bath.
• Only rinse and wash fabric with fabrics of the same color for the first few cycles. After a few washings you should be able to wash the dyed items with other clothing as well.
• When using old fabric and onesies, old stains may dye differently than the rest of the fabric. But hey, might as well give them a shot. Throw them in the dye bath and see what happens!

And that's about it.
Please feel free to leave your own tips in the comments!
Happy dyeing.

TUTORIAL: gauzey swaddle blankets

With each baby addition to our family, new products pop up on the market. And 4 years ago when Owen was born I'd never seen gauze swaddle blankets. But by the time he was done swaddling, all my friends were using these really cool blankets. And they're genius!--lightweight (which is great in a hot climate), a bit stretchy, and they wrap so nicely around a baby. So with Clara coming, I knew I wanted to make my own.
You can buy gauze swaddle blankets in a 3 or 4 pack at Target and other retail stores. But I didn't care for their prints and wanted to make them more bright and cheery.
Like any receiving blanket these are easy to do. We're just sewing/finishing off the sides of a 45x45 inch square piece of fabric (that's 1 1/4 yards of fabric).

But I'm sure your big question is---where do you find colorful gauze fabric?

You've got a few options:
• Joann and other large fabric stores carry a few colors and they always have white.
• You can dye the white fabric to a fun color (check out my easy fabric dyeing tutorial here). If you plan to dye fabric (rather than a onesie) however, make sure you have a very large bowl with enough water for the fabric to swim freely and get the fabric wet before dunking it in the dye. I would also cut the fabric down blanket size before dyeing so it's easier to swish around in the dye bath.
• If you live in LA area....I bought these fun colors (along with teal and dark blue) at Michael Levine in the LA Fabric District. They had lots of great options.
Okay, let's get started...
• Cut a 45 x 45 inch square of fabric (42x42 or less will work fine too).
Now, you've got a few options for sewing the edges under. You can always just serge the edges and fold them under but I wanted a more polished look. So...
• Option 1: Cut the raw edges into a fairly straight line (you can leave the selvage edges as-is). Iron the edges under about 1/4 inch, which isn't the easiest to do since gauze can be a bit wonky and stretchy. Then fold the ironed edge under another 1/4 inch and sew it down. Free-hand hold the edge as you sew (rather than pinning) and keep going. However, I found that it was hard to keep the edge as straight as I wanted. So I went with option 2 (easier for me)...
• Option 2: Cut the raw edges as above but don't bother with ironing. Just fold the edge under 1/4 inch, then fold it under another 1/4 inch and start pinning periodically around the blanket. Don't go crazy with the pinning; just enough to keep it all in-line as you sew. Sew down the edges And you've got a pretty little blanket!

NOTE: When you get to the corners, just fold one edge over the other. Don't both with mitered edges or anything fancy.
• Option 3: Add hearts or other simple applique to the top.
Cut hearts from scraps of knit fabric. I went with gold and white and just free-hand cut them by folding the fabric in half. Then fold the corners of the blanket under (as you would when swaddling a baby) so you don't place any hearts where their head might be which could be uncomfortable.
Then place your hearts around, pin them in place, and sew them on.
Go slowly around the curved areas and don't tug the fabric as you go. Lift your presser foot periodically, allowing the fabric to relax and pop back in place.
Three blankets done!
When giving as a gift, roll each blanket and tie them together with a fabric scrap ribbon and gift tag.
Easy baby shower gift.
Everyone will love them.
Sweet dreams baby.
Check out the Celebrate BABY archives HERE.