Wednesday, December 3, 2014

How to Sew with Oilcloth + Geo Garland project


It's the first day of our Don't Fear the Fabric series!

I'm tackling Oilcloth and Kate's talking about Leather.  So make sure you hop over to her blog when you're done drooling over these happy fabrics.
(don't worry, it's all water-proof. We can wipe up any messes)
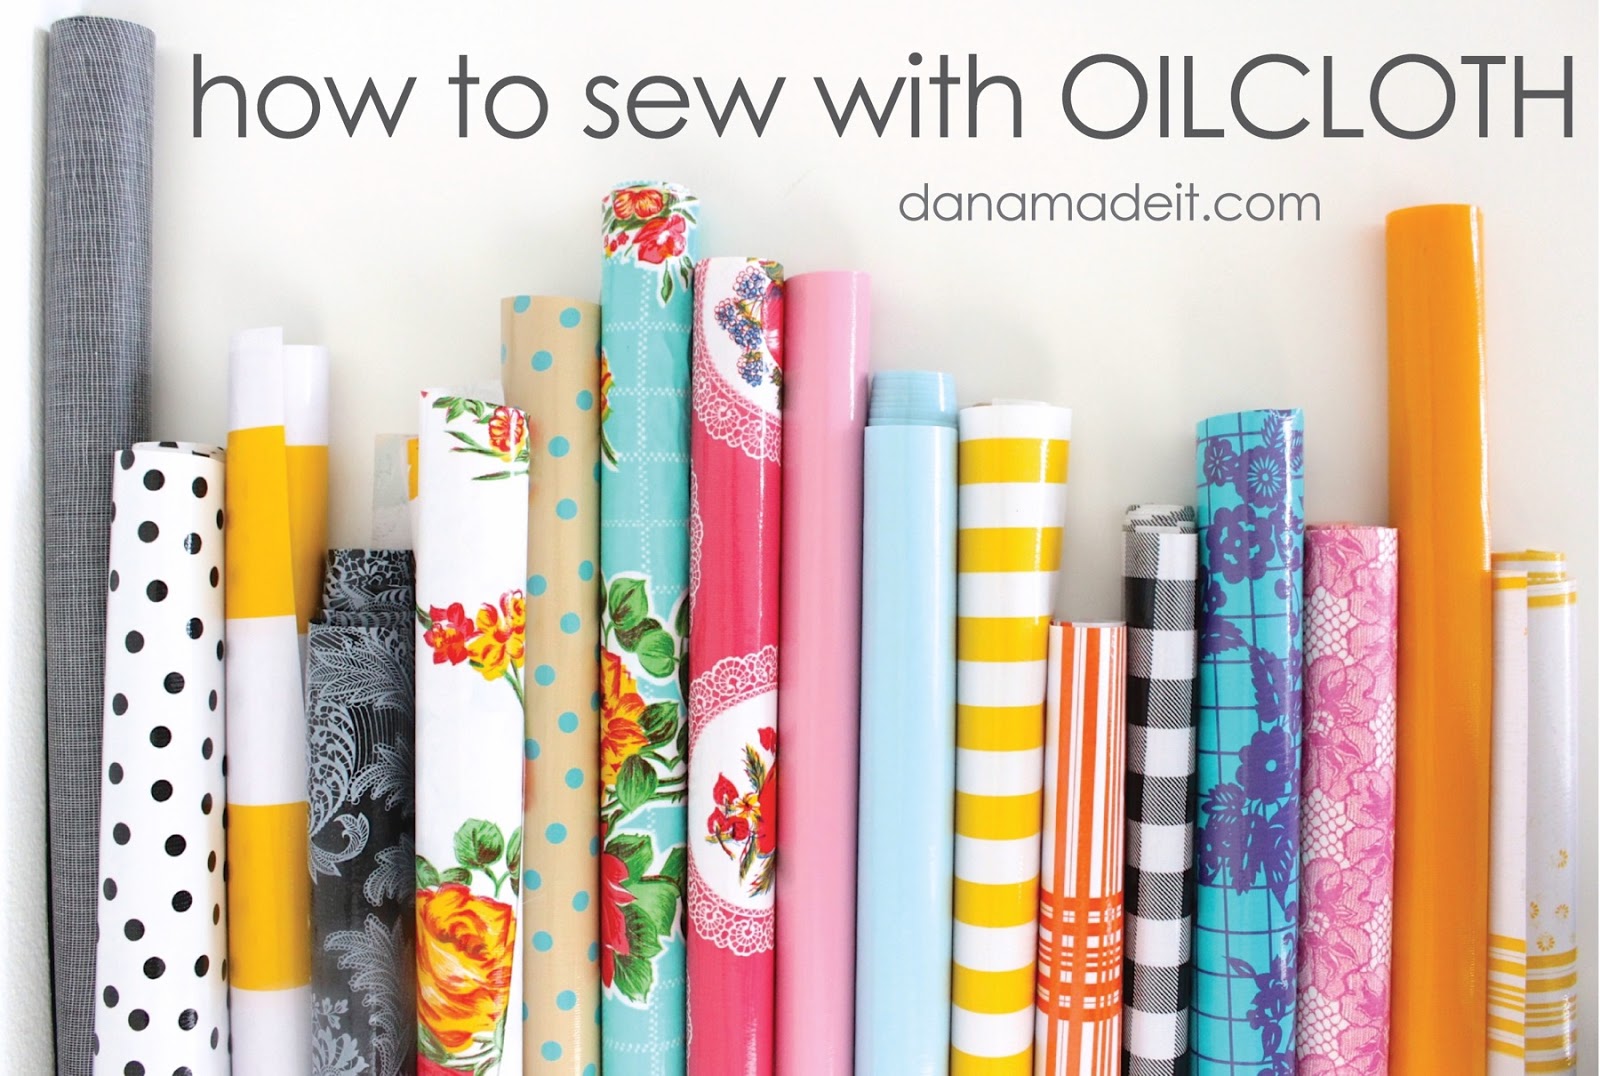

Seriously though, doesn't the look of Oilcloth just make you....happy?

It's bright and colorful, cheerful and peppy, and the slick/plasticy finish feels a bit retro---maybe it reminds you of a fun pastime or a great restaurant you once ate at?
Oilcloth fabric just evokes happy emotions.
At least that's how it makes me feel.
I guess that's why I want to blog about it...and buy it in every print design!  Yikes. I might have an oilcloth problem.
Of course buying fabric is never a problem, as long as you actually do something with it.
That's how I see it.
So let's talk about Oilcloth and get you sewing some projects!

• What is Oilcloth?
It's a vinyl fabric, with a woven cotton mesh backing.  So it's shiny and plastic-like on one side, and slightly rough on the other side.  It was originally used in the fishing and sailing industry and was once made of oil-infused canvas fabric---which is where the name Oilcloth comes from.
• Uses
The beauty of Oilcloth is that it's water resistant!....which means it can be wiped clean.
So it's fantastic for a variety of projects: tablecloths, beach bags, chair coverings,  aprons, crafts, etc.

• Sourcing and Purchasing
Oilcloth comes in many colors and prints.  And the prints are kinda of what gives it that old vintage vibe.  With funky fruit designs, bold color combos, stripes and dots....there's something for everyone.

You can purchase Oilcloth in some fabric stores, but online selections are best.
My two favorite stores are:
Oilcloth by the yard
Oilcloth Addict

• Oilcloth vs Laminated Cotton
Some online stores sell both Oilcloth and Laminated Cotton....which are similar in theory but have their differences.

--Oilcloth is a man-made vinyl fabric, it's slightly stiff, and water-resistant on both sides.  When you look up close on the back side of oilcloth you'll see that stiff mesh backing.

--Laminated cotton is actually part of the cotton fabric family.  It's basically quilting cotton with a thin layer of transparent vinyl over the top. If you look close at the back you'll see that basic cotton weave. 
 
Laminated cotton is softer and more pliable than oilcloth, but it's also more expensive and potentially less durable.  I've never done real research on that, but it seems easier to tear and weaken over time.  Now you can actually make your own laminated cotton, which is really fun and pretty easy to do!  But I'll have to save that for another post.
The upside to laminated cotton is that there are more print options than oilcloth.  AND it's a great fabric for baby bibs and baby toys.
A while back people used oilcloth for baby bibs, but it should be noted that in the US, the Consumer Product Safety Act prohibits the use of Oilcloth for bibs and toys for children, due to high levels of phthalate softener in the fabric.  This means it shouldn't be used for items that will go directly in someone's mouth.  But there are still plenty of uses for the fun fabric.

• Storing
At first glance these pretty rolls might look like wrapping paper.  But there's actually a reason behind it!
Because oilcloth is a stiff fabric and will crease easily, it's best to keep it rolled, rather than folded.
When you purchase Oilcloth online, it may ship rolled or folded.  If it was folded, you'll want to open it up and place it on the floor near a window where the sun can warm it a bit (to get some of the wrinkles out), and then roll it up for storing.  
The best method for storing is to layer a few fabrics on top of each other and roll them all up together with a wrapping paper roll inside (I guess it is like wrapping paper!)  I like to store the rolled fabric on the floor under my bed, rather than standing up in the corner of my sewing room because gravity starts to pull the oilcloth layers down, and they become smashed at the bottom of the roll.
• Pressing
Now here's the part where I'm supposed to tell you to never iron Oilcloth, because it's plastic!....and it will melt!
That's totally true.
A hot iron should never directly touch the fabric.
But now I'm going to tell you that you can iron oilcloth if you're careful.  Because let's be honest, a warm room will never get hard creases out of the fabric no matter how hard the sun tries.

So.
Try this on a sample piece first and keep your ion on a lower heat setting till you see how the fabric reacts.
Place a dishcloth or press cloth over the top of the fabric.
Press for a few seconds at a time on the creased areas. 
When you lift the iron, the fabric will be warm and pliable....and the creases will be gone!
The ironing method is great when trying to remove wrinkles.  But when pressing out a seam, finger pressing works great---just use your fingers press down at the seam, like you're folding a piece of paper.
• Cutting
You can cut oilcloth just as you do other fabrics---either with a rotary cutter and mat, or with scissors.
And maybe this is just me....but whenever I use scissors to cut through that smooth fabric, it sorta feels like I'm cutting through butter.  I love this fabric!
• Sewing with Oilcloth
At some point we're actually going to start sewing.  PROMISE.
But first let me share a few more tips.

Sewing on the wrong side of oilcloth is easy.  And sewing on the right side of the fabric is easy as well....but because it's vinyl, the fabric has the tendency to stick under your presser foot as you sew on the right side.  Now don't let that stop you!  You can always use the strength of both hands to help feed the fabric through your machine as it sews. 
But here are 3 better ideas:

1. Transparent Tape
You can place a bit of tape on the bottom of your presser foot to make it more "slippery".  You'll want to poke out the tape from the presser foot openings, where the needle passes through.  This is a good trick, but it's not a permanent solution. 
2.  Tissue Paper
Sandwich the area you're sewing with a piece of tissue paper on top and bottom and sew.  The stitches help to perforate the paper and you can tear it away when you're done.  The downside to this method is that small pieces of paper tend to stick under the thread, so it can be annoying to get the seam really clean.
3.  Teflon Presser Foot
This is my preferred method.  A plastic teflon foot just snaps on to your machine and glides smoothly with your fabric.  You can purchase it for most machine brands for fairly inexpensive.  And it looks like a little tooth.  That's gotta make you smile!
You can see in the photos below how the fabric looks, sewing on the wrong side and sewing on the right side.  As you sew, the needle pierces the fabric and will leave holes behind.   So it's best to use a slightly longer stitch since small stitches tend to perforate the fabric and may cause the seam to tear over time.
Also, after "finger pressing" your fabric, a topstitch is a really nice way to get your seam to lay flat.
• Pinning
Just as the machine needle will pierce through the fabric, pins will too.  So don't use them to hold your project together.  Of course the nice thing about oilcloth is that when right sides of the fabric are together, the plastic layers kind of "stick" to each other, holding your project in place.
But when you do need to hold things together, use binder clips or these fantastic wonder clips.  Oh I love these!  They're inexpensive and really work wonders!  Go buy a pack.  They'll make you happy too.
Okay!
Enough talking.  Let's start sewing!
Pick out a few of your favorite prints and let's make a geo garland.....or a geoilcloth garland??
Too much?
Yea.  Too much.
Okay.  You can cut your fabric into any shape.  I cut squares of fabric and then cut them into triangles.
And another great thing about oilcloth is that the edges don't fray.  So we're just going to sew single layers of fabric together.  This means you will see the backside of the fabric if the garland spins.  So if that bothers you, you can always sew two layers of each shape together (with wrong sides of the fabric together)
Okay, leave a tail of thread on the end before you sew, do a little backstitch, and then start sewing right down the middle of the first triangle.  Then place the next piece under your presser foot and sew down the middle.  I left a small space between each triangle and continued sewing the "blank space" as I went.  This will create a little chain in between each triangle.  When you're done sewing all your pieces together, leave another thread tail at the end and hang it up!
This is a fantastic project for outdoor parties, since oilcloth can get wet.

Rain or shine, the party is ready!
Okay.  Feel more confident sewing with Oilcloth?
Great!
Tomorrow we'll take it a step further and make a simple gift you can giveaway....or keep for yourself.
-------------------------------------------------
Now head over to See Kate Sew because she's got 6 tips for sewing with Leather!


Tuesday, December 2, 2014

Brand New Video!--the video that will change your life....

Okay.
That's a little dramatic.
But seriously!
I've wanted to share this with you guys for years!
And now you'll want to share it with your friends, your spouse, your kids....anyone!  It's not a sewing video.

It's something I learned in high school and I use it ALL THE TIME.
It's my little gift to you, since I'm sure you've felt like this before...


It doesn't need to be that hard! 
I'm going to show you a simple way to tie a bow on a box and it works every time.
EVERY TIME.

Let me break it down:
• This method uses the proper amount of ribbon, without any waste.
• There are NO knots, anywhere....so your gift actually lays flat on the bottom....and the gift-opener can untie it without using scissors.
• The bow actually hangs straight, without flipping up the top.
• And my favorite part....you don't need anyone to hold their finger tight in the middle while you try to tie a bow around the gift!  In fact, you can even walk away in the middle of it and the ribbon stays in place!
I love it!
Okay. I'm excitedly rambling.
Let me just say:
Ready to try?
Just hit the play button below and enjoy and share it around....

[tube]https://www.youtube.com/watch?v=jdU_X3Q9UFk, 680,383[/tube]

MADE EVERYDAY with Dana is a fresh new show, making everyday items you'll use and love.
To watch other episodes:
• Click the VIDEO tab at the top or….
• Subscribe to my Youtube channel so you’re updated as soon as the episode goes live.


Tuesday, November 25, 2014

Don't Fear the Fabric--with Dana and Kate

It's been a while since I did a fun series here on the blog.And when I held that survey a while back (thank you for taking it!  It was very helpful!)....many of you mentioned that a series is something you'd love to see more often.

So let's do it!

We're calling it Don't Fear the FABRIC.
And I'm hosting it with Kate from See Kate Sew!  

We hope this is an ongoing series throughout the year, focusing on various fabrics that you may (or may not) be scared to try.  Because fabric should never be feared!--which is the whole premise of my book Fabrics A to Z.  So let's arm you with the info and tips you need to get out of the cotton rut....and jump into the world of interesting textiles!  

This round we're focusing on Oilcloth and Leather. 
Cause, well....oilcloth and leather!  Who doesn't love the look of those fabrics?!  I'm always amazed at how a mix of textures in a project really pops it to life.

 Kate will share expert tips for sewing with leather, where to buy it, and what to make with it.
Then I'll tackle Oilcloth with a bunch of projects for sewers and NON sewers. 
Looking for handmade Christmas gift ideas??
You've come to the right place!
The series will be happening on both our blogs from 12/3 to 12/12.
It's just me and Kate, no guests, and 8 days of fabric fun (and some freebies of course!)
So enjoy your Thanksgiving meal and come back ready to sew!


my new Sewing Machine!...and how to pick your own

I've been meaning to share this with you for two months now.I got a new sewing machine!
And I love it.

Sorry for all the exclamation points.
It's just really exciting to get a new toy.
And this little baby (heh, heh, baby).....is called Lyric, by Baby Lock.
Have you ever walked up to your front door and seen a pile like this??
Okay. You probably have.
But if your pile is filled with sewing machines?? rather than diapers and mulch for the front yard??....then jump up and down and start (carefully) ripping those boxes open!
Yay for Baby Lock!
I'm so happy I get to partner with them.
They've let me try out the Lyric machine before it's on the market (it comes out in spring of 2015).   So this is a little preview for you all.  Of course Baby Lock offers many wonderful sewing machines so if you're ready to jump in, the Elizabeth and Melody machines are comparable and just as fantastic. 

Over the years you guys have asked me for a recommendation on sewing machines. 
Maybe you're even asking Santa for one for Christmas??
So here are my thoughts on selecting a new machine....

When it comes to picking any kind of sewing machine, I think two things are important:
1 - Quality
2 - The basics

A good quality sewing machine can make the difference between really enjoying sewing, and being frustrated by it.  And no one wants to be frustrated with a new hobby.   Of course those decisions are hard to make if you're just starting out---it's hard to know how committed you are to it.  But if you think sewing is more than just a passing interest for you, I would definitely recommend getting a quality machine.  It will truly make a difference, especially when sewing with knits.

I love that Baby Lock offers a wide range of sewing machines for all skill levels.
If you're new to sewing there's a whole series of machines with cute names like Molly, Rachel, and Elizabeth.  Isn't that adorable?  And if you're a high-tech gal, you can jump up to the Destiny and Unity and do some top-of-the line fancy stitching.
So I would go for the best quality machine your budget allows.  


Now,"quality" doesn't have to mean that it can do 400 different things.....because I really believe that if you have a quality machine, then all you ultimately need are the basics---a straight stitch, a zigzag stitch, and a button holer.  And you're set.  That's all that I've used for years.

Now that being said....
I really do love all the extra things my machine can do, cause they make the process a whole lot more fun and more efficient!  And many Baby Lock machines offer similar features as well. 
So let me give you a little tour of Lyric....
I've never had a machine with this many stitches!  I think there are over 250?
I know I will never use that many, since I'm not into embroidery and stuff like that.  But what I do love is that it offers multiple "overcasting" stitches which are meant to stretch with your fabric, so they're fantastic on knits.  It doesn't replace the overcast stitch that a serger machine can do (I'll have to talk about sergers in another post) but it's fun to play around with all the different stitches to see what they can do.  I'll be showing you the overcast stitch in some upcoming videos. 

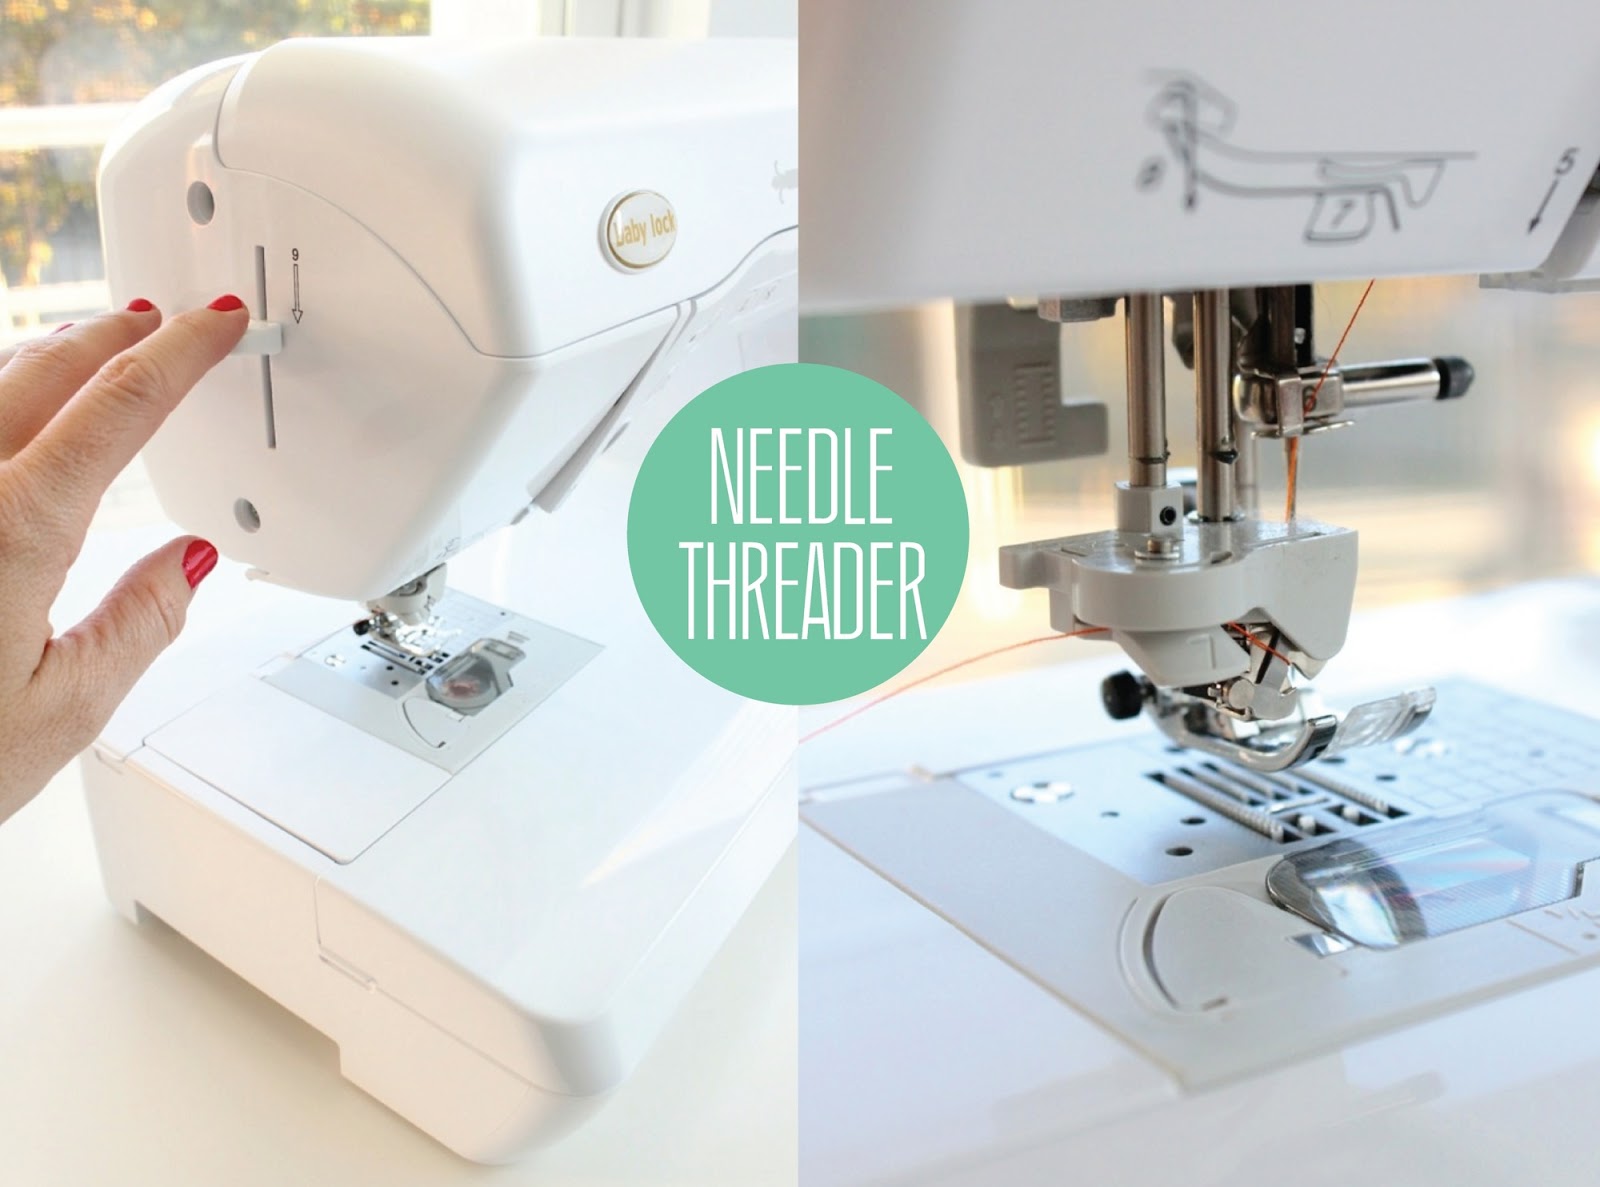
Okay. Next happy-dance feature: Automatic Needle Threader!
Ummmmm.  Where have I been???  This function alone has changed my sewing life. 
I thread my machine like normal, following the little guides.  And when I get to the needle, I just push that level on the side, and boom!  The machine threads the needle for me!  It's such a time (and sanity) saver.

Okay: Speed Control
Are you a fast sewer?
Me too.  I sew like I talk.
And sometimes it gets me in trouble because I really just need to slow down and take my time around the curves.  So the speed control helps me do that---kind of like setting the cruise control on your car.  You just set the speed where you'd like and it will control how fast the foot pedal can go.  Then you're always IN control. I never knew I would appreciate such a function.
But I definitely knew I would love this feature---the Thread Cutter!
Oh wow.  
This little button makes me a much faster sewer.  Haah.  Weren't we just talking about slowing down?
What I meant to say is that it makes me a more efficient sewer.  When I'm done sewing I just push the little scissors function and it cuts everything for me!  I don't even need my real scissors around. 
Game changer.   For sure.

And finally...this machine is digital.
I know many of you have been sewing on digital for years. But I've always been a little old school, turning knobs and clanking along (which believe me, works really great).  So it's pretty spiffy to have a nice digital display with menus and info to keep me organized.
And there are so many more things I could tell you about this machine, like the knee lift (which lifts the presser foot), the extension table, the programming features....but I'll have to show you that in future posts.
Let's just say:

Okay.
One last thing to address before buying a new machine....
Where DO you buy a machine?

Well you can buy machines online, in fabric stores, on craigslist, all over!
And when you buy Baby Lock machines (and other comparable brands) you buy them from a retail store that's certified to sell them, with experts who help you get to know your machine right there in the store (click here to find a retailer).
Sometimes they even offer a few free lessons with the purchase of your machine so you feel comfortable sewing with it.  This is how it was when I bought my serger years ago.  And it was wonderful!....because that step always feels intimidating, especially if you're new to sewing.  For some reason you're scared to pull it out the box and thread it for the first time---worried that you might do something wrong?!  Which of course is a bit silly, but we've all been there.  So don't worry!  Those store experts are there to help you get started.
And of course I am too.
This is why I love blogging and sharing and helping where I can and asking for your advice in return!

So there you go.
That's my advice for picking a new sewing machine!
I'm excited to see what you pick!
Happy shopping.


Monday, November 24, 2014

one fantastic sewing gift for you + a friend

It's December 1st!
The countdown to Christmas has begun!
Just three more weeks for my poor husband to figure out what his crazy crafting, sewing wife would enjoy for a Christmas gift.....since you know, I'm never confusing with my wish list, and I never change my mind at the last minute, and I never expect him to be a mind-reader and pick up on subtle clues as to what gift I would really love.
Nah.
I'm never difficult.
I'm just a woman, right?
So why not make it easier on our dear men!
I've got two ideas for you.

First....why not just WIN your Christmas gift??
For you + a friend?!
That would make two husbands very happy.
Thanks to Craftsy, today I'm giving away a custom-made Quilter's Table that will fit any brand of sewing machine...for you, and for your friend!
Sa-weeet!

You don't have to be a quilter to enjoy this table.  It's really just an extension table that makes it easier to sew and control your fabric, plus there's a grid which makes it easier for quilting.  It's pretty fantastic.
Here's some more info:
• 22 1/2" x 22 1/2" acrylic extension table with adjustable legs.
• Table has a grid with angle markings, a blue storage-compartment drawer, and a lock to secure table to machine.
• Each table is custom-made.
• Total prize value = $240

To Enter the Giveaway:
• Log into Craftsy using your email address and password (if you're not a member, it's super easy to join....and you'll want to join because they have all sorts of free patterns and great classes.  Also, if you're already logged into your account, simply log off and then log in again from my direct link here above)
• US residents only
• One entry per person
• One winner will be selected on/around 12/11/14.
• Winner will receive 2 Sew Steady Quilter's Wish Tables, for you and one friend of your choosing

Okay.
Christmas Gift idea #2....
Why not show your husband some of the fantastic sewing classes at Craftsy?!
Wouldn't a new class be so much fun to "open up" on Christmas morning?
I mean, who wants to learn how wax-resist fabric printing works?? 
Me please! Me!
Or how to create a whole new nursery for your baby?
.....want to learn to quilt? (to go with that great quilter's table you just won? eh? eh???)
Or how about a class on fitting garments to YOUR body size with Joi Mahon?  I sat next to her at a Baby Lock Sewing event this summer and she was such a joy to chat with!  I asked her all sorts of questions about sewing swimsuits with lycra and after 5 minutes, I felt like a new sewist.  The girl knows her stuff.
If you're new to Craftsy, the site is full of creative online classes, free patterns, and you have access to them forever, on any of your electronic devices. The instructors are top notch.  And with 5 million members on the site, it's a great place to ask questions and read other people's questions/comments as well.
So go for it!
Head on over and pick out your favorite class.....and remember that when you log into your Craftsy account, you + a friend will be entered into the sewing table giveaway!  Click here to enter!


 This post is sponsored by Craftsy.